Gluten-free | Dairy-free | Egg-free | Nut-free | Clean eating option | Soy-free option
This is a great, easy, adaptable weeknight option for getting lots of protein and colorful veggies with minimal effort! Just include whatever veggies your family likes (or at least will tolerate) and watch them scarf it down!
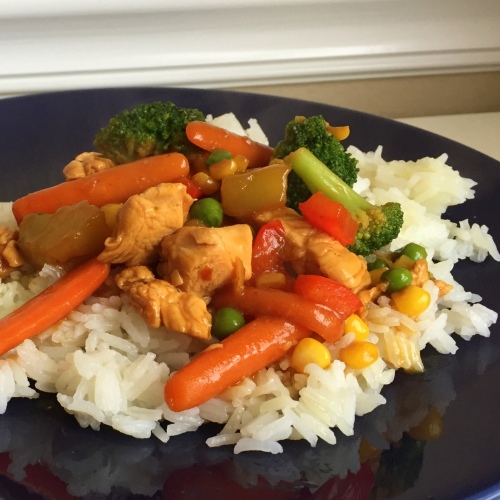
Colorful Chicken Veggie Stir-Fry
Original recipe here
- 1 lb chicken breasts, cut into bite-sized pieces
- 1/4 cup gluten-free tamari sauce (or soy sauce)*
- 1 Tbsp rice vinegar (apple cider vinegar works great too)
- 1 tsp sesame oil (optional)
- 2 cloves garlic, minced
- 1/4 tsp ground ginger
- up to 1/4 tsp red pepper flakes
- 3/4 cup low-sodium chicken broth (gluten-free)
- 2 tsp corn starch
- 1 Tbsp grapeseed oil (or other high-heat oil like canola), divided
- up to 6 cups assorted veggies (I used halved baby carrots, diced red pepper, frozen broccoli florets, frozen peas, and frozen corn–just use what you have on hand. Other suggestions: zucchini, squash, red onion, edamame, etc.)
- cooked rice, for serving (use brown rice for clean eating)
*For soy-free, try coconut aminos
- Combine tamari sauce, vinegar, sesame oil (if using), garlic, ginger, and red pepper flakes in a medium bowl, then add chicken and toss to coat.
- Marinate 10 minutes in the refrigerator, then drain, reserving marinade in a measuring cup. Add chicken broth, then whisk in corn starch until smooth.
- Heat 1 tsp oil in a large wok or nonstick skillet over medium-high heat. Add chicken. Stir-fry until cooked through. Set aside.
- Increase heat to high and add remaining 2 tsp oil to wok. Add veggies in order of how long they take to cook: carrots obviously are first, then broccoli, then smaller veggies. Remember frozen veggies take less time to cook. Stir-fry until crisp-tender; do not overcook, as they’ll continue to soften when you add the sauce.
- Add chicken and sauce, then stir-fry until sauce has begun to thicken, 2-3 minutes.
- Serve over cooked rice.