Tag Archives: vegan

Last-minute dinner solutions.

You guys, this pregnancy has been kicking my butt: something to do with it being my first time being pregnant in my 30s, combined with having to keep 3 kids alive–including a 2-year-old part-tornado, part-monkey, part-evil genius. At 23 weeks–the usually FUN! trimester–I’m already acutely feeling every single third-trimester ache and pain, and I’m spending most afternoons on the couch. Definitely not the speed I’m used to.

So dinner time has been interesting!

Most of the time, eating out actually makes me feel worse, so what’s a mom who’s solo for dinner time going to do? Simplify. Which, honestly, means a lot of pasta. My girls are kind of sick of pasta. But it’s easy, it’s versatile, and aside from the overuse it generally doesn’t elicit complaints from the under-5′ set. (I still can’t believe that my 7-year-old is already over 4 feet tall.) And I’m really not operating on enough cylinders to think far enough ahead to do the Crock Pot thing.

Rather than blog each recipe individually (I’m tired, remember? And my back is already hurting just sitting typing this… How many weeks do I have left?), I’m just going to make a roundup of the last-minute dinner saviors I’ve been using lately. Some are from my blog, and some are from others; all photos are property of their original publishers.

Peas and Pasta, from Weelicious

Meatless | Clean eating | Soy-free | Gluten-free option | Nut-free
peas-pasta

This has been a last-minute staple in our family for years. It is SO easy, SO fast, and uses ingredients I always have on hand, so when it’s 4:40 and I haven’t even thought of dinner, this is it. I use whole-wheat pasta to keep it clean and up the protein and fiber to make it more filling; you can use gluten-free pasta if needed. Also, because this is a very mild dish, easy on the seasonings and spices, it’s usually one of the first recipes I attempt when I’m coming out of morningsickness, and it’s a good one when a bout of nausea blindsides me again.

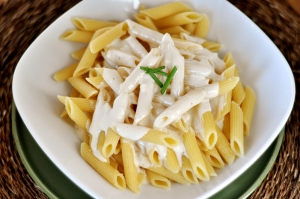
Creamy Garlic Alfredo, from Mel’s Kitchen Cafe:

Meatless | Mostly Clean eating | Soy-free | Gluten-free option | Nut-free
alfredo1-jpg

Again, super easy, super fast, and uses things I already have in my fridge. The only forethought required is softening the cream cheese a bit, though in a pinch I’ve just thrown it in cold. Again, I use whole-wheat pasta, but gluten-free would work.

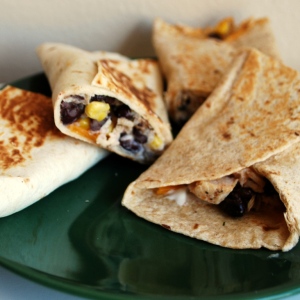
Southwest Chicken Wraps:

Nut-free| Gluten-free option | Soy-free option | Clean-eating option
dsc_0260

For a break from pasta, here’s what we had tonight. These are great because I can cobble together leftover bits from other nights when I’m feeling well enough to make more of an effort for dinner (read: weekends, when my husband’s able to be home to wrangle girls) to make a hearty meal with very little effort. I always cook up extra rice and extra chicken to keep in the fridge, and the rest comes together quick. The best part is that I can stretch the filling recipe over two meals, and freeze half, so that on nights like tonight, all I had to do was pull it out in the afternoon to thaw on the counter, then grab the cheese, sour cream, and tortillas, and in less than 15 minutes dinner’s on.

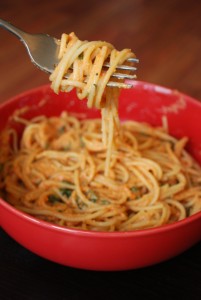
Vegan Creamy Tomato Basil Pasta:

Dairy-free | Soy-free | Clean eating | Vegan | Gluten-free option
036

(I really need to update that photo now that I have a Vitamix that actually makes the cashew sauce legitimately creamy.)

Anyway, here’s another really easy pasta option. As long as you’ve got the ingredients on hand, it comes together quick. The sauce literally cooks for maybe 5 minutes. So your dinner is done in the time that it takes to boil some water and cook some pasta. And my girls consistently down this one. I used to dial down the garlic and basil, but I don’t need to anymore.

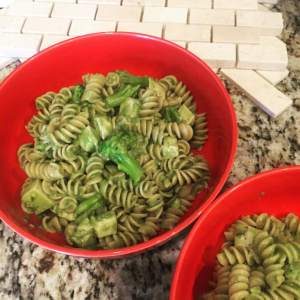
Skinny Chicken Broccoli Alfredo:

Clean eating | Soy-free | Nut-free | Gluten-free option | Meatless option
img_8408

This one is really versatile. Lately I rarely add the step of turning the sauce green; I just leave it white. Sometimes I make it without chicken if I don’t have any cooked chicken on hand. Again, I make a habit of keeping all of the essential ingredients in my kitchen, so that I can make some variation of this protein-filled dish any time. The roux sounds intimidating, but even though there are a few steps to it, the sauce comes together really fast–again, just in the time it takes me to boil a pot of water and cook my pasta.

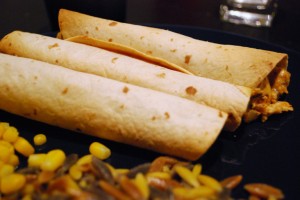
Creamy Chicken Taquitos:

Soy-free option | Clean eating option | Gluten-free option | Nut-free
006

Another non-pasta option! This week I dusted this one off from a long time ago–when I was still firmly in my semi-homemade days. I think this is from when I was pregnant with my second kid. It’s been awhile. I bought a rotisserie chicken from the Costco that just opened a couple miles away (yay!!!!!), chopped it up, and whipped these up. They’re easy to freeze for later, so now I have another dinner waiting for me to just throw in the oven!

If dinner time has become a chore or a panic-inducing time at your house, I hope that some of these ideas help you a little. Even as tired, gross, unmotivated, or sore as I might feel, I’m so grateful that I have so many options in my back pocket to pull out to keep my family–and myself and my growing baby–fed and healthy. Now, I’m not going to lie: the other night we had oatmeal. And we do hit the Chick-fil-A drive-through or order pizza or Thai takeout not infrequently. But I’ve noticed, more acutely this pregnancy than ever, that even though it takes effort I just feel better after a home-cooked meal. Even if it is just pasta with some kind of sauce on it.

I do have a few new recipes to post, hopefully soon. In the meantime, I’m going to spend some more quality gestating time on my couch.

Leave a comment

Filed under Adventures in Mommydom, Recipes

Clean(er) flourless brownies with fudge frosting.

Gluten-free | Mostly clean eating | Soy-free | Nut-free | Egg-free | Dairy-free option | Vegan option

img_1795

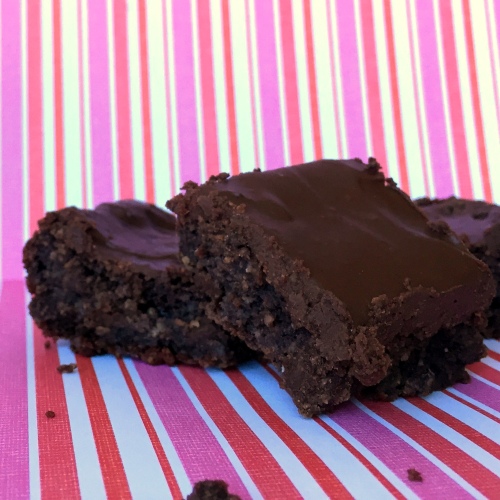
If you’re looking for a healthier treat (maybe for Valentine’s Day?) that still tastes just as rich as sinful, these might just be it. They’re moist and fudgy (especially with the fudge frosting!), without all the butter, flour and (most of the) refined sugar (depending on which brand of yogurt you use; more on that later).

Now, I will say that these are not something I would make when I’m having a spur-of-the-moment chocolate craving because they require a lot more planning and time than my one-bowl delicious brownies, but when you’ve got a chocolate craving AND you’re trying to work around dietary restrictions, the little bit of extra work makes it worth it. Plus I don’t feel like a total blob after eating a couple of these–and it’s much easier to stop at one or two with these than with my usual go-to recipe because they’re so much richer. So wins all around!

As for the brand of yogurt, this is important: You need to find a vanilla Greek yogurt that’s pretty thick. I like Oikos Triple Zero, but wound up using an organic variety that happened to have refined sugar in it instead of the stevia because I wanted a truer flavor; either way, you usually need two of the small cups to make this recipe. If you’re going dairy-free, you can try a coconut yogurt, but your ordinarily-very-thick batter will be thinner, which may affect baking time, so keep an eye on it. Borderline underdone is better than the alternative. If you do try the coconut yogurt, please let me know how it goes! I just couldn’t do coconut yogurt when I was dairy-free: not enough protein to warrant the expense and all the sugars. But when that’s what you’ve got to work with, I totally get it, and I would love nothing more than for these to work for you!

Cleaner Flourless Brownies

Adapted from here

  • 1 1/2 cups Enjoy Life semisweet mini chocolate chips, or similar, divided
  • 3 fl oz (1/4 cup plus 2 Tbsp) melted virgin coconut oil (measure after melting)
  • 1 cup vanilla Greek yogurt or coconut yogurt (see note above about brand)
  • 1 tsp pure vanilla extract
  • 1/2 tsp salt
  • 1/2 tsp baking soda
  • 3/4 cups oat flour (blend or process regular oats in a blender or food processor until fine)
  • Fudge Frosting (below)
  1. Preheat oven to 350 and line a square baking dish–8×8 or 9×9–with parchment, then lightly spray with soy-free cooking spray.
  2. Place melted coconut oil and 1 cup of the chocolate chips in a microwave-safe bowl and microwave in 30-second intervals, stirring in between, until chips are melted. (Should take only 2 or 3 rounds in the microwave.)
  3. Pour melted chocolate into a medium mixing bowl and add yogurt; mix well. Stir in vanilla, salt, and baking soda.
  4. Stir in oat flour until incorporated, then fold in remaining 1/2 cup chocolate chips.
  5. Spread mixture (it will be quite thick) evenly in prepared pan, then bake 28 minutes or until a toothpick inserted in the center comes out mostly clean.
  6. Remove from oven and allow to cool completely in pan, then frost with Fudge Frosting (below).
  7. Frosted brownies will keep on the counter in a sealed container up to a week.

Fudge Frosting

Adapted from the more time-intensive version I made here

  • 1/2 bag Enjoy Life semisweet mini chocolate chips
  • 2-4 Tbsp coconut cream,* or similar amount of yogurt used above, or combination

*Coconut cream: refrigerate a can of coconut milk several hours, until it separates. Remove the can very carefully, without shaking it, and open it without disturbing the cream. Carefully spoon the cream from the top of the can, reserving the coconut water at the bottom for later use in a smoothie or something.

  1. Place chips and coconut cream or yogurt in a small saucepan over medium-low heat. Heat while stirring constantly, until melted and incorporated.
  2. Add more cream or yogurt until the mixture reaches a smooth, medium consistency. You want it to be not too thin but still spreadable. I started with a couple tablespoons of coconut cream because that’s all I had, then added yogurt a tablespoon at a time.
  3. Pour into a bowl and chill in the refrigerator a few minutes until just set, then remove, stir, and spread evenly over the cooled brownies.
  4. Allow to set–may take up to an hour–and then cut brownies into 16 squares and enjoy!

1 Comment

Filed under Recipes

Paleo Blueberry Scones.

Paleo | Vegan option | Gluten-free | Dairy-free | Clean eating

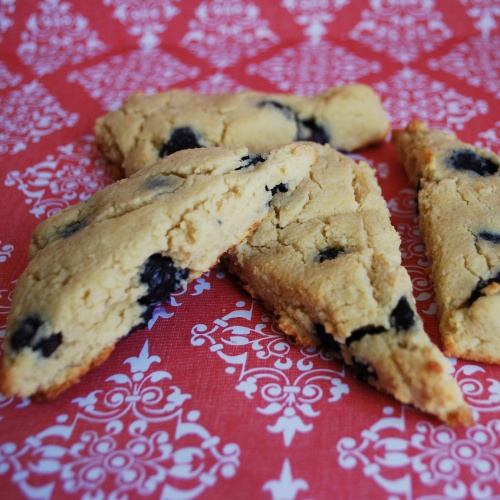
DSC_0270


I have always loved scones. Something about the bite being firmer than a muffin but still moist, and so flavorful.

Because of the time we spent in London exactly a year ago now, when a Teacher Appreciation Week breakfast was proposed with an English tea theme, I jumped at the chance to spearhead it! I ordered scones, English muffins, and bread from our Publix bakery; my mom sent homemade jam and marmalade; I displayed all the British children’s books I’ve amassed over the years (a LOT of books); and we had toasters and teas for the teachers to help themselves to. But I knew some teachers (my daughter’s included–yes, I’m biased) can’t have traditional bread or scones because of allergies and intolerances, so I sought out an allergy-friendly scone recipe for them.

I found it. Oh boy, did I find it! They were SO good, and they were gone SO fast. With our new farm-fresh blueberries, I just had to make them again! The texture is a little less dense than normal scones, but no less delicious: not too sweet, and so flavorful.

Paleo Blueberry Scones

Original recipe here

  • 1/2 cup coconut flour
  • 1 1/2 cups almond flour or macadamia flour
  • 1 1/2 tsp. baking powder
  • 1/2 tsp. salt
  • 2 large eggs (for vegan, use 2 flax eggs)
  • 3 Tbsp. maple syrup
  • 1/3 cup coconut milk, room temp
  • 1/4 cup coconut oil, melted and cooled
  • 3/4 cup blueberries
  1. Preheat oven to 350 and line a baking sheet with parchment.
  2. In a large mixing bowl, whisk together the dry ingredients.
  3. In a smaller bowl, whisk together the liquid ingredients.
  4. Add the wet ingredients to the dry. The mixture should be slightly crumbly but stay in one mass. If your mixture is too dry, add a couple more drops of coconut milk.
  5. Gently fold in blueberries.
  6. On a wax paper-lined cutting board, form the dough mass into your favorite scone shape. I form it into a square about 3/4-inch thick all around, then use a large chef knife or offset spatula to cut it into 6 rectangles. Halve each of those into a triangle and you’ll end up with a dozen triangles about 3-4 inches to a side.
  7. Carefully use the knife or spatula to lift each scone onto your baking sheet, spacing a couple inches apart.
  8. Bake 16 minutes or until just golden.
  9. Let cool completely before enjoying!

Leave a comment

Filed under Recipes

Clean Sweet Potato Oven Wedge Fries.

Dairy-free | Soy-free | Gluten-free | Nut-free | Clean eating | Paleo | Vegetarian | Vegan

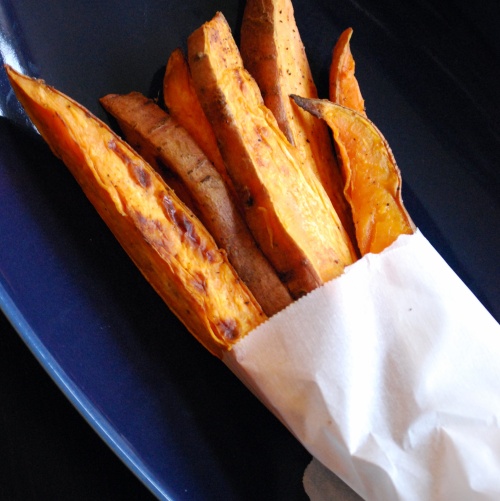
DSC_0042

This is one of my favorite, easiest ways to make sweet potatoes. (I’ll post the other one soon; we eat LOTS of sweet potatoes around here.) I got the original recipe from a paleo blog while we were living in London and had very few kitchen tools to cook with, but then I guess the blog disappeared because I can’t access it anymore! So since I still make this all the time, I’m posting my version here so that hopefully it never gets lost again.

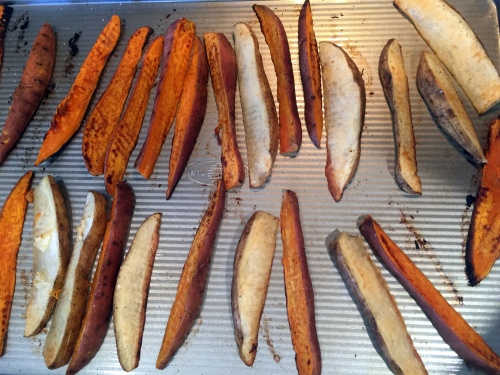
The beauty of it is there’s no wrong way. You can make them salty, spicy, sweet–or a combination of all 3. I even throw one Russett potato in there for the 2/5 of my family who don’t like sweet potatoes (gasp!). The trick to getting them crispier without burning them is using a very small amount of oil. They’re still not going to be as crisp as the ones you buy in the freezer section that are coated with stuff to enhance the texture, but they’re so delicious.

IMG_8744

Sweet Potato Oven Wedges

  • 2-3 large sweet potatoes, scrubbed well and well dried off
  • up to 1 Tbsp. olive oil
  • spices of choice: I use about 1/2 tsp. salt, a sprinkle of pepper, and a touch of paprika. Try cinnamon and a little maple syrup; or salt, thyme, and cayenne; or any of your favorites! Please comment below with what you enjoy; I love trying new variations!
  1. Preheat oven to 400.
  2. Slice your sweet potatoes lengthwise into 1/2-inch wedges and place in a large bowl.
  3. Drizzle a very small amount of olive oil and toss with your hands until wedges are just coated. Sprinkle on about 1/2 tsp. salt (or your maple syrup–remember, small amounts), tossing as you go.
  4. Spread them in a single layer onto an ungreased nonstick baking sheet. Don’t use parchment paper or foil; it makes them harder to flip. Sprinkle remaining seasonings over the top.
  5. Bake at 400 for 15 minutes, then remove and flip all the wedges. Return to oven and bake another 11-15 minutes.
  6. Enjoy!

8 Comments

Filed under Recipes

Clean Caramel Popcorn.

Vegan | Clean eating | Dairy-free | Soy-free | Nut-free | Gluten-free

DSC_0080

I love Christmas traditions! Tonight we put on our Christmas PJs, made some caramel popcorn, and turned on one of our all-time favorite Christmas movies, White Christmas. My little dancers love to watch the dance numbers, and we all love this delicious caramel corn, which is completely unprocessed, making it a great clean treat that won’t weigh you down like so many other holiday foods. It’s so quick and uses ingredients that you already have in your pantry.

Clean Caramel Popcorn

  • 3 Tbsp coconut oil, divided
  • 1/2 cup popcorn kernels
  • 1/4 cup maple syrup
  • 1/2 tsp sea salt
  • 1 Tbsp vanilla
  1. Place 1 Tbsp coconut oil in the bottom of a large, deep pot with a tight-fitting lid, preferably with a rounded bottom (a wok works great). Melt over medium-high heat. Add popcorn kernels and cover. Shake back and forth every 20 seconds or so to heat all of the kernels evenly.
  2. After a couple minutes, it should start popping. Continue shaking back and forth at intervals. When popping slows, remove heat immediately.
  3. Pour into a large bowl. In a small saucepan (or in the same big pot if you’re lazy like me), add remaining coconut oil, maple syrup, and salt. Bring to a boil and boil for 2 minutes. Remove from heat and stir in vanilla.
  4. Pour caramel over popcorn, tossing to coat evenly. Then pour it all out onto a parchment-lined baking sheet to cool a bit before enjoying. (Optional: if you like a saltier, more kettle-corn-like flavor, sprinkle a bit more sea salt over the caramel corn on the baking sheet.)

Original recipe here

DSC_0079

2 Comments

Filed under Recipes

My Dairy-Free Thanksgiving.

Thanksgiving is less than two weeks away, and if you’re like me you’re probably trying to figure out what you’re making for dinner. A year ago at this time I was scrambling to figure out how I could keep a traditional and delicious Thanksgiving with a newborn and without dairy or soy. And you know what? I pulled it off! Some of these are so good that they’re finding their way onto our table again this year, even without dietary restrictions (except for my 1-year-old).

If you’ve got a dinner guest with dietary restrictions, or if you’re facing some yourself this year, here’s my dairy-free (and, of course, other-allergen-free) menu from last year. All photos are courtesy of the original blogs.

W-SFirst off, here’s my secret to the most flavorful turkey every year, regardless of how you prepare it: Williams-Sonoma dry brine. All you do is rub it on the turkey Wednesday night, keep it covered overnight in the fridge, then rinse off the brine just before you prep it for cooking. It adds the flavor and tenderness of a brine without the mess or time, and has never ever failed me. It’s dairy-free, soy-free, gluten-free, clean, and paleo. Just make sure you reduce the salt in your recipe.

slow-cooker-turkey3We had a small gathering last year, so a turkey breast was just the right size for us, and this Slow Cooker Turkey with No-Fuss Gravy from Mel’s Kitchen Cafe made it easy, delicious, and kept my oven clear for the sides since I was the only one cooking. And the gravy? Easily the easiest and tastiest I’ve ever made in my life. Because of the saltiness of the dry brine, I didn’t add any salt and used the no-salt-added chicken broth. I made it dairy-free by using Earth Balance buttery stick instead of the butter; you could easily make this gluten-free with rice flour or another fine-grain gluten-free flour, or make it clean with whole-wheat pastry flour. We’re expecting a crowd at this year’s dinner; this is so good I’m seriously considering making this turkey breast in addition to the whole turkey in the oven, if I can get home from my Turkey Trot in time.

stuffingMy family’s generations-old super-secret stuffing recipe is…. doctored Pepperidge Farm stuffing. (Shhhhh.) But the soy additives weren’t going to work last year, so I was going to have to make it from scratch. I used this America’s Test Kitchen Easy Stuffing Recipe, with a Whole Foods bakery dairy- and soy-free sandwich bread and Earth Balance buttery stick. Now, I’m going to be honest: Earth Balance does not brown like butter does. But it was delicious nonetheless.

I made my mashed potatoes smoother with a bit of Earth Balance, some chicken broth, and a touch of unsweetened almond milk. I don’t have a recipe for that; I just kind of added and tasted until the taste and texture was right. And anyway, with that slow cooker gravy, who cares what the potatoes tasted like on their own?!

sweetpotatocasserolevegan-2335Now these sweet potatoes are definitely staying on my table for years to come. Saweet! Potato Casserole with a Crunchy Nut Crumble from Oh She Glows is vegan (and thus dairy-free), gluten-free, soy-free, clean, and so incredibly delicious that I was actually a little disappointed that everyone else liked it so much because I seriously could’ve eaten the whole pan on my own. Now, just in case you think I’m exaggerating, my husband doesn’t like sweet potatoes, and he’s instantly suspicious of anything with a “healthy” buzzword like “vegan” or “paleo”–and he asked for seconds. If I had a double oven, I’d be making two of these this year. Now, if I remember right, I increased the amount of maple in the crumble, but I don’t recall by how much. Just taste and adjust as needed.

2011pumpkinpieFinally, the pumpkin pie. I’ve posted a milkless pumpkin pie of my Grandmother’s, but–no offense to her–I could never get the texture quite the way I liked it. This Dairy-Free Soy-Free Pumpkin Pie keeps the silky texture we’re used to, but amps up the flavor with the sweetness of coconut milk and a touch more spice than you see on the back of the Libby’s can. Sorry Grandmother–this is my new go-to pumpkin pie. I made the crust from my previously posted pumpkin pie recipe using canola oil to keep it soy-free; there are lots of great gluten-free crust recipes out there if that’s what you need. Top it with So Delicious CoCoWhip topping and you’ll be in Heaven. (I challenge you not to eat the CocoWhip with a spoon after your company has left…)

What are your plans this Thanksgiving? Are any of these or other allergen-friendly recipes going to be on your menu this year?

2 Comments

Filed under Holidays

Oldies but goodies, revamped.

With the new direction we’re taking, I thought I’d go back into some of my old favorites and bring them back in our new light. All of these are dairy- and other allergen-free, and most are clean and unprocessed. All are delicious and totally family-approved.

Sw008eet potato pancakes – These are perfect for fall, and for switching things up on the pancake front for breakfast or “brinner.” I recently gave them a clean makeover, and I honestly think they taste better than before!

peanut butter ballsPeanut butter protein balls – A perennial favorite in our house. I always have a batch sitting in the freezer to thaw a few for us to eat. If you have a new mama in your life, these are perfect for quick, easy energy during those ravenous first few weeks of breastfeeding; plus, the flax and oats help with milk supply.

creamy tomato basil pastaVegan creamy tomato-basil pasta – “Vegan” used to be a dirty word in our house, but once we got past that, this is quite possibly the perfect weeknight pasta dish, especially when you’re dealing with dietary restrictions. I dial the garlic and basil down from the original recipe and throw a couple handfuls of short pasta into the water with the spaghetti to keep the little ones happy. This was the first meal where my little one ate exclusively “grownup” food!

chicken curryChicken curry – I seriously love yellow curry. Good thing, because for awhile it seemed like the only MSPI-safe restaurant food in the U.S. was Thai curry! I think my girls got sick of curry after awhile. If you don’t have delicious Thai takeout nearby, this one is easy, delicious, and family-friendly because you can adjust the spices up or down.

banana swirlOne-ingredient ice cream – Quick, easy, lots of ideas to change it up, and dairy-free! I think this will come in handy as my MSPI baby starts to notice more that sorbet isn’t the same thing as ice cream and wanting some too.

peanut butter cookies 1Flourless peanut butter cookies – Sometimes, as a stressed-out mom of a newborn, who felt like I couldn’t eat anything, ever, I just needed a treat. Or several. Dairy-, soy-, and gluten-free, these fit the bill for dietary-restriction-sufferers. And the protein was great for nursing!

Leave a comment

Filed under Recipes

Vegan for carnivores: Easy creamy tomato basil pasta.

Dairy-free | Soy-free | Clean eating | Vegan | Gluten-free option

My good friend posted the link to this recipe months ago & raved about its tastiness. I was intrigued, so I pinned it, but I never mustered the courage to actually make it.

Because it’s vegan.

creamy tomato basil pasta

Vegan is a dirty word in our house of meat-eaters. But it looks just so tasty, right?

So one day I took the plunge. I had a backup plan in place–a jar of pasta sauce hiding at the back of the pantry–that I considered employing even as the mixture was simmering. How could cashews possibly make a sauce creamy?

But it worked. Oh boy, did it work. Rich, tomato-basil-garlic heaven. & it was easy!!! Now I understand why my friend raved about it. Fellow carnivores (or at least omnivores), please don’t make the mistake I did & wait forever: make this immediately.

Note: while the original recipe says this makes enough for 2 servings of pasta, I’ve coated a whole pound of pasta in it & it’s worked great. I also add a little more tomato flavor.

  • 2 medium-sized ripe tomatoes
  • 1/2 cup cashews
  • 1/4 cup water
  • 1 1/2 Tbsp. tomato paste (optional)
  • 1 Tbsp. olive oil
  • 2-4 cloves garlic (I use 2), minced
  • up to 1 tsp. salt, or to taste
  • black pepper, to taste
  • 1/3 cup fresh basil, or to taste, finely chopped (if you, like me, don’t buy fresh herbs often, the small plastic package of basil that hangs out in the refrigerated part of the produce section is just enough for this recipe)
  • up to 1 lb. of pasta of your choice (we use whole-wheat)
  1. Bring a large pot of salted water to boil. Meanwhile, chop the tomatoes & toss them, seeds & all into your blender. Add the cashews, water, & tomato paste, & puree until smooth.
  2. Add the pasta to the boiling water & cook as directed. Meanwhile, heat the oil in a large saucepan on medium-low. Add the garlic & saute a couple minutes, taking care not to burn it. Add the contents of the blender. Bring it to a simmer; add the salt.
  3. Let it simmer 4-5 minutes, stirring frequently.
  4. Remove sauce from heat; stir in pepper & basil.
  5. When pasta is done cooking, reserve about 1/3 cup pasta water, drain, & return to pot. Slowly add the sauce until it looks coated enough for your taste, adding pasta water if needed. Stir & serve immediately.
  6. Leftovers refrigerate & reheat well!

Aside from the tastiness, healthiness, & easiness of this recipe, The Toddler Who Won’t Eat Anything ATE THIS!!!

yum!

WIN!


Leave a comment

Filed under Healthy living, Recipes

One-ingredient ice cream.

I’ve missed sharing ideas with people! I’ve decided to set a goal of posting at least once a week. Now that The Mini-Munchkin is about the same age that The Munchkin was when I started this, I feel like I can take the time to set up more good photos & write some more. Though the girls are so big now, I don’t think I could call either of them Munchkin anymore. I’m currently accepting nominations for new aliases for my 4- & 1-year-olds.

But so that I don’t bite off more than I can chew, let’s start with something easy, shall we?

banana swirl

This ice cream has one ingredient: bananas.

It’s easy to make. It’s fat-free, sugar-free, dairy-free, gluten-free, vegan, & delicious.

It’s been making the Pinterest rounds, & even Daniel Tiger on PBS is getting into the act; my 4-year-old informed me that this comes from one of his shows & is called “Banana Swirl.”

Instructions:

Just take about 1 ripe (but not banana-bread ripe; I made that mistake this first time. Think still yellow.) banana per person, cut them into thirds or quarters, & freeze. I just stuck mine in a Ziploc baggie. After a couple of hours, remove them from the freezer, stick them in your blender or food processor, & pulverize. The “snow” setting on my Breville worked like a dream. After a couple of minutes, you should see smooth, soft-serve-looking “banana swirl.” That’s it!

Dairy-free | Soy-free | Nut-free | Gluten-free | Vegan

Why does this happen? Bananas have high pectin levels. Pectin is the gelling agent that you add when you make jam. It acts as a stabilizer to create that creamy texture. Mangoes apparently also have high pectin levels & would likely produce the same effect if frozen & blended.

This is a great treat for summertime. We made ours to refuel after gymnastics, but I’m thinking one morning I might top it with fruit & granola & serve “ice cream” for breakfast, just to shake things up a bit! What do you think of that?

2 Comments

Filed under Recipes