Tag Archives: snacks

(Mostly clean) Honey Greek Yogurt Blueberry Muffins.

Soy-free | Nut-free | Mostly clean

DSC_0250

It’s blueberry season in Florida! We went picking on Wednesday at a farm just 15 minutes up the road. We were there less than an hour and came home with 4 pounds of blueberries, 2 pounds of the season’s first peaches and nectarines, and a pint of blackberries for good measure. So much amazing local fruit!

So needless to say, there will be some blueberry recipes popping up in the near future.
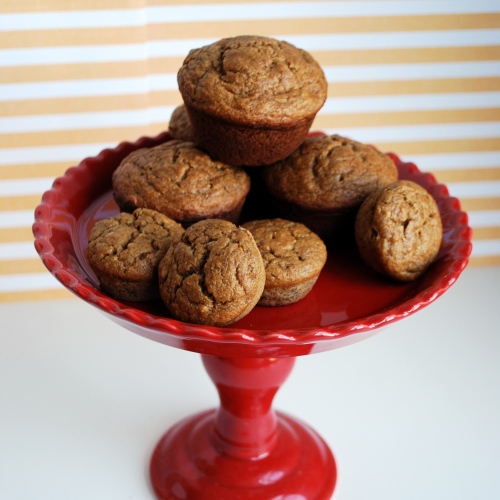
loooove blueberry muffins. They’ve always been my favorite, but usually they are so laden with butter and refined carbs that they can hardly be called breakfast. So I was so excited to find this recipe! I love the added protein from the Greek yogurt and whole-wheat flour. It still does have some refined sugar, but after much testing it’s really the only way to keep them both palatable and the right consistency.

Honey Greek Yogurt Blueberry Muffins

Original recipe here

  • 3 cups whole-wheat pastry flour*
  • 1/2 cup plus 3 Tbsp. brown sugar**
  • 1 Tbsp. baking powder
  • 1/2 tsp. baking soda
  • 1/2 tsp. salt
  • heaping 1/2 tsp. cinnamon
  • 1 cup lowfat Greek yogurt
  • 1/2 cup milk (any percentage but skim)
  • 1 tsp. vanilla
  • 2 large eggs, room temp
  • 1/4 cup honey
  • 1/2 cup mild-tasting olive oil (or melted coconut oil)
  • 1 cup fresh blueberries, rinsed and dried well
  • optional: cinnamon-sugar for sprinkling

*Whole-wheat pastry flour is more finely sifted than regular whole-wheat flour, so it more closely approximates all-purpose flour in texture. You can sub in up to a cup of regular whole-wheat flour, but more than that and your muffins will end up too dense.
**I did sub in coconut sugar for those extra 3 Tbsp. and it didn’t affect the taste.

  1. Preheat oven to 375 (400 if you’re using a silicone muffin tin) and line your tin(s) with about 18 paper liners.
  2. In a large bowl, whisk together dry ingredients.
  3. In a medium bowl, whisk together liquid ingredients until well blended.
  4. Using a rubber spatula, stir the wet ingredients into the dry until just incorporated.
  5. Fold in blueberries.
  6. Scoop 1/4 cupfuls into each well of the muffin tin. Optional: sprinkle each with a little cinnamon-sugar.
  7. Bake 18 minutes. (For a silicone pan, decrease oven temp to 375 after 9 minutes of baking.)
  8. Let cool a few minutes in the pan before transferring to wire rack to cool completely.

Leave a comment

Filed under Recipes

Clean, Dairy-Free Banana Muffins or Mini Muffins.

Gluten-free option | Clean eating | Dairy-free option | Soy-free 

DSC_0116

UPDATED 7/11/17 (ooh! A palindrome!) with gluten-free option.

My friend Jessica is the first person I go to for clean recipe ideas–if I’m in a rut or just haven’t found a version I love yet of what I’m looking for. So today, when I noticed I had 4 bananas browning on my counter, and every other clean banana recipe I’d tried had come out completely flavorless, I went straight to her–halfway across the country. And as usual, we’re all full and happy over here. Isn’t food great that way? I love that even when miles and miles separate us, we can still gather together and keep in touch through good food.

This is a Martha Stewart recipe thoroughly substituted with clean ingredients. You should end up with up to a dozen and a half standard-size muffins, close to 3 dozen mini-muffins, or, like I did, a full pan of regular muffins and a half pan of minis.

Banana Muffins

Adapted from here

  • 4 ripe bananas
  • 2/3 cup coconut sugar
  • 1/4 cup melted coconut oil
  • 1/4 cup unsweetened applesauce
  • 1 large egg
  • 2 cups whole-wheat pastry flour (or sub in up to a cup of regular whole-wheat flour with all-purpose flour)*
  • 1 tsp. baking powder
  • 1 tsp. baking soda
  • 1/2 tsp. salt
  • 1/2 cup soured almond milk** or dairy sour cream
  • 1 Tbsp. vanilla

* GLUTEN-FREE: Substitute 1 cup brown rice flour, 1/4 cup tapioca starch, 1/4 cup potato starch, and 1/2 cup oat flour (I just put some oats in my blender, pulse them to a fine powder, and pour them in a mason jar for future use).

** Sour your almond milk the same way you make buttermilk: for every cup needed, add 1 Tbsp. of white vinegar to a measuring cup and fill the rest of the way with milk and let sit sit several minutes. In this case, add 1/2 Tbsp. of vinegar and then fill to the 1/2 cup line with almond milk.

  1. Preheat oven to 350. Grease your muffin tin(s) with soy-free cooking spray (I use PAM for Grilling).
  2. Peel bananas and add them to the bowl of your stand mixer. Use the paddle attachment to beat until well mashed, about a minute. Add coconut sugar, coconut oil, applesauce, and egg and beat until smooth.
  3. Add dry ingredients to bowl; mix on low until well incorporated.
  4. Add soured almond milk and vanilla; mix until well incorporated.
  5. Scoop scant 1/4-cupfuls for standard muffins and/or 2-Tbsp.-fuls for mini muffins (dough scoops work really well here) into the wells of your muffin tins. Bake 20 minutes for mini muffins or 25 minutes for standard muffins, rotating pans halfway through cooking time. Cool on a wire rack before enjoying.
  6. Store in an airtight container on the counter or freeze to enjoy later!

Leave a comment

Filed under Recipes

Clean Caramel Popcorn.

Vegan | Clean eating | Dairy-free | Soy-free | Nut-free | Gluten-free

DSC_0080

I love Christmas traditions! Tonight we put on our Christmas PJs, made some caramel popcorn, and turned on one of our all-time favorite Christmas movies, White Christmas. My little dancers love to watch the dance numbers, and we all love this delicious caramel corn, which is completely unprocessed, making it a great clean treat that won’t weigh you down like so many other holiday foods. It’s so quick and uses ingredients that you already have in your pantry.

Clean Caramel Popcorn

  • 3 Tbsp coconut oil, divided
  • 1/2 cup popcorn kernels
  • 1/4 cup maple syrup
  • 1/2 tsp sea salt
  • 1 Tbsp vanilla
  1. Place 1 Tbsp coconut oil in the bottom of a large, deep pot with a tight-fitting lid, preferably with a rounded bottom (a wok works great). Melt over medium-high heat. Add popcorn kernels and cover. Shake back and forth every 20 seconds or so to heat all of the kernels evenly.
  2. After a couple minutes, it should start popping. Continue shaking back and forth at intervals. When popping slows, remove heat immediately.
  3. Pour into a large bowl. In a small saucepan (or in the same big pot if you’re lazy like me), add remaining coconut oil, maple syrup, and salt. Bring to a boil and boil for 2 minutes. Remove from heat and stir in vanilla.
  4. Pour caramel over popcorn, tossing to coat evenly. Then pour it all out onto a parchment-lined baking sheet to cool a bit before enjoying. (Optional: if you like a saltier, more kettle-corn-like flavor, sprinkle a bit more sea salt over the caramel corn on the baking sheet.)

Original recipe here

DSC_0079

2 Comments

Filed under Recipes

Oldies but goodies, revamped.

With the new direction we’re taking, I thought I’d go back into some of my old favorites and bring them back in our new light. All of these are dairy- and other allergen-free, and most are clean and unprocessed. All are delicious and totally family-approved.

Sw008eet potato pancakes – These are perfect for fall, and for switching things up on the pancake front for breakfast or “brinner.” I recently gave them a clean makeover, and I honestly think they taste better than before!

peanut butter ballsPeanut butter protein balls – A perennial favorite in our house. I always have a batch sitting in the freezer to thaw a few for us to eat. If you have a new mama in your life, these are perfect for quick, easy energy during those ravenous first few weeks of breastfeeding; plus, the flax and oats help with milk supply.

creamy tomato basil pastaVegan creamy tomato-basil pasta – “Vegan” used to be a dirty word in our house, but once we got past that, this is quite possibly the perfect weeknight pasta dish, especially when you’re dealing with dietary restrictions. I dial the garlic and basil down from the original recipe and throw a couple handfuls of short pasta into the water with the spaghetti to keep the little ones happy. This was the first meal where my little one ate exclusively “grownup” food!

chicken curryChicken curry – I seriously love yellow curry. Good thing, because for awhile it seemed like the only MSPI-safe restaurant food in the U.S. was Thai curry! I think my girls got sick of curry after awhile. If you don’t have delicious Thai takeout nearby, this one is easy, delicious, and family-friendly because you can adjust the spices up or down.

banana swirlOne-ingredient ice cream – Quick, easy, lots of ideas to change it up, and dairy-free! I think this will come in handy as my MSPI baby starts to notice more that sorbet isn’t the same thing as ice cream and wanting some too.

peanut butter cookies 1Flourless peanut butter cookies – Sometimes, as a stressed-out mom of a newborn, who felt like I couldn’t eat anything, ever, I just needed a treat. Or several. Dairy-, soy-, and gluten-free, these fit the bill for dietary-restriction-sufferers. And the protein was great for nursing!

Leave a comment

Filed under Recipes

Maple Oat Pumpkin Muffins.

Dairy-free | Soy-free | Nut-free | Clean eating

Maple Oat Pumpkin Muffins

One major discovery I’ve made in my clean-eating journey is that I have an inherent sweet tooth–and depriving myself on this or that diet plan just sets me up for failure because I never feel quite satisfied. So now I’m learning to find clean, healthy ways to satiate that need for sweetness, and as a result I don’t need “cheat days” or “when I’m done with this 21-day challenge I’ll gorge myself on X, Y, and Z.” So on here you’re probably going to be seeing a lot of clean sweets.

I don’t think I could ever get sick of good pumpkin treats. My friend recommended these beauties to me a couple months ago, and I’ve made them at least four times since. They disappear SO fast–even when I freeze 2/3 of the batch. (They do freeze beautifully, by the way; just wrap one in a paper towel and zap it in the microwave for 20-30 seconds to thaw.) My whole family loves them; even My Husband The Reluctant gave them the glowing review the first time he ate them of, “I would like these even if I weren’t forced to eat clean!” They’re sweetened with real maple syrup in addition to the natural sweetness of the pumpkin, and the oats and whole-wheat pastry flour make them hearty enough to be a light breakfast–without weighing you down.

Maple Oat Pumpkin Muffins

  • 1/3 cup melted coconut oil
  • 1/2 cup maple syrup, room temperature
  • 2 large eggs, room temperature
  • 1 cup canned pumpkin puree
  • 1/4 cup unsweetened almond milk (or other milk of choice)
  • 1 tsp. baking soda
  • 1 tsp. vanilla
  • 1/2 tsp. salt
  • (heaping) 1/2 tsp. cinnamon, plus more for sprinkling
  • (heaping) 1/2 tsp. ground ginger
  • 1/4 tsp. nutmeg
  • 1/4 tsp. ground allspice (or cloves)
  • 1 3/4 cup whole-wheat pastry flour*
  • 1/3 cup old-fashioned (not instant) oats, plus more for sprinkling
  1. Preheat oven to 325 and grease** the cups of a muffin tin.
  2. In a large bowl, whisk together coconut oil and syrup. Beat in eggs. Mix in pumpkin and almond milk until smooth, then mix in soda, vanilla, salt, and spices.
  3. Switch to a large rubber spatula or wooden spoon. Add flour and oats at once, stirring until just combined.
  4. Scoop scant 1/4-cups of batter into muffin cups (an ice-cream-style scoop works really well for this), then sprinkle with a few oats and some cinnamon.
  5. Bake for 23 minutes or until a toothpick inserted in the center comes out clean. Wait until cooled (or try to) to remove them from the pan.

* Whole-wheat pastry flour is ground finer than other whole-wheat flours, so baked goods come out lighter and less dense; it is an ideal substitute for all-purpose flour. I pretty much only use this now, even in my less-clean recipes.

** If you’re going soy-free, PAM for Grilling is the only mainstream brand of cooking spray I’ve found that does not contain soy lecithin. I use it for everything!

Original recipe here.

Leave a comment

Filed under Recipes

Lunch bag: Healthy No-Bake Peanut Butter Balls

Dairy-free option | Soy-free | Gluten-free option | Clean-eating option

peanut butter balls

My 4-year-old’s preschool asks parents to pack healthy snacks that feature at least 2 food groups. This being my first year packing anything resembling a school lunch, of course I’m going over the top looking for fun, healthy snack ideas she’ll eat. This has been my first great victory: they’re easy, she loved helping me make them, they travel well, they’re not messy, & even My Husband The Suspicious Of Anything Labeled “Healthy” gave them his stamp of approval.

UPDATE: This is my new go-to to take to new moms. The oats and flax are great for breastmilk supply, and the quick energy is awesome for those early weeks of nursing All. The. Time.

  • 2 cups quick oats (use certified gluten-free if needed)
  • 1 cup Rice Krispies*
  • 1 cup flaxseed meal
  • 1 cup mini chocolate chips**
  • 1 cup creamy peanut butter (we use Natural Jif or Skippy)*
  • 2/3 cup honey
  • 2 tsp. vanilla
  • 2 Tbsp. coconut oil
  1. Combine all ingredients in a large bowl, mixing gently to not crush the cereal, until well coated.
  2. Use a tablespoon or soup spoon to scoop out tablespoon-sized portions & roll them into balls between your hands. Place them on a parchment- or waxed-paper-lined cookie sheet.
  3. Refrigerate for 1-2 hours. You can serve them now, or place them in a Ziploc bag in the freezer to portion out in your kids’ lunches. They’ll keep a week in the fridge or a few months in the freezer.

* If you want to keep it 100% clean, use a less-processed brown rice cereal, or sub 2/3 cup more of quick oats, and use fresh-ground peanut butter (though that will make it much harder to mix) or another brand of jarred peanut butter that doesn’t contain refined sugar.

** For dairy- and soy-free, use Enjoy Life brand chips.

Original recipe here.

Linked up at Mommy Solutions

2 Comments

Filed under Healthy living, Recipes

One-ingredient ice cream.

I’ve missed sharing ideas with people! I’ve decided to set a goal of posting at least once a week. Now that The Mini-Munchkin is about the same age that The Munchkin was when I started this, I feel like I can take the time to set up more good photos & write some more. Though the girls are so big now, I don’t think I could call either of them Munchkin anymore. I’m currently accepting nominations for new aliases for my 4- & 1-year-olds.

But so that I don’t bite off more than I can chew, let’s start with something easy, shall we?

banana swirl

This ice cream has one ingredient: bananas.

It’s easy to make. It’s fat-free, sugar-free, dairy-free, gluten-free, vegan, & delicious.

It’s been making the Pinterest rounds, & even Daniel Tiger on PBS is getting into the act; my 4-year-old informed me that this comes from one of his shows & is called “Banana Swirl.”

Instructions:

Just take about 1 ripe (but not banana-bread ripe; I made that mistake this first time. Think still yellow.) banana per person, cut them into thirds or quarters, & freeze. I just stuck mine in a Ziploc baggie. After a couple of hours, remove them from the freezer, stick them in your blender or food processor, & pulverize. The “snow” setting on my Breville worked like a dream. After a couple of minutes, you should see smooth, soft-serve-looking “banana swirl.” That’s it!

Dairy-free | Soy-free | Nut-free | Gluten-free | Vegan

Why does this happen? Bananas have high pectin levels. Pectin is the gelling agent that you add when you make jam. It acts as a stabilizer to create that creamy texture. Mangoes apparently also have high pectin levels & would likely produce the same effect if frozen & blended.

This is a great treat for summertime. We made ours to refuel after gymnastics, but I’m thinking one morning I might top it with fruit & granola & serve “ice cream” for breakfast, just to shake things up a bit! What do you think of that?

2 Comments

Filed under Recipes

5-fruit* muffins for your Munchkin’s lunchbox.

*or 4 fruits & a gourd, depending on how you choose to classify pumpkin.

School’s started for most everyone by now, & I know lots of moms are looking for tasty but healthy options for their kids’ lunchboxes. These muffins fit the bill: they contain five different fruits (as long as you consider pumpkins fruits), as well as almonds & whole-wheat flour. They pack a quick & hearty nutritional punch so your kids can get back onto the playground. They’re so hearty that The Munchkin can only finish half of one, so you may want to consider packing just a half muffin, or else making them in a mini-muffin tin & adjusting the baking time.

They’re also great for new moms because of their heartiness & ease of one-handed consumption. They were brought to me after The Mini-Munchkin made her appearance & I begged for the recipe, so that’s why you’ve got it here!

The recipe says it makes a dozen muffins plus 2 loaves; when I made a half recipe, it yielded not quite 18 muffins. You can choose how & if you want to divvy up the batter. As an added bonus, if you make a half recipe, you’ll have plenty of pumpkin left over in a standard can to make these delicious pumpkin chocolate-chip squares. Just saying.

  • 3 to 4 extra-ripe bananas, peeled & mashed (2 cups)
  • 1 cup pumpkin
  • 3 eggs
  • 1 1/2 cups sugar
  • 1 cup unsweetened applesauce
  • 3 cups all-purpose flour
  • 2 cups whole-wheat flour
  • 1 Tbsp. baking soda
  • 2 tsp. cinnamon
  • 1/2 tsp. cloves
  • 1 cup chopped dates
  • 1 cup raisins
  • 1 cup sliced almonds
  1. Preheat oven to 350. Generously grease muffin tin &/or loaf pan(s). Combine bananas, pumpkin, eggs, & sugar in mixer bowl. Beat in applesauce.
  2. In a separate bowl, combine dry ingredients. Stir into banana mixture until just combined.
  3. Fold in dates, raisins, & almonds.
  4. Spoon 1/4 cup of batter into each muffin cup; pour remaining batter into loaf pans, if applicable.
  5. Bake muffins for 20 minutes or loaves for 60 minutes. Cool in pan 5 minutes, then cool completely on wire rack.

Leave a comment

Filed under Healthy living, Recipes

The Perfect Oatmeal Raisin Cookie.

Oatmeal has a special place in my heart. Oats just make every recipe better, don’t they? Heartier, tastier, healthier (yes, I am still deluding myself on this one) — you just can’t go wrong with oats! This Martha Stewart recipe is no exception.

These are our travel staple: any time we’re headed on a road trip, I make up a batch the day before & they keep us going forever. In fact, we had two Indiana-Utah road trips in six months that went awry — in Wyoming both times — & these cookies sustained us in countless mechanic’s shops & in the middle of the I-80 median for hours! (Let’s just say that a new car & a new undercarriage on the new car later, we’ve come to the conclusion that either Wyoming hates us, or their mechanics love us. No offense meant to anyone out there who hails from Wyoming — we’ve just had exceptionally bad luck driving through it.)

  • 2 cups flour
  • 1/2 tsp. salt
  • 1/2 tsp. cinnamon
  • 1 tsp. baking powder
  • 1 tsp. baking soda
  • 2 sticks butter, room temp
  • 1 cup brown sugar
  • 1/2 cup sugar
  • 1 Tbsp. vanilla
  • 3 Tbsp. milk
  • 2 eggs
  • 3 cups rolled oats (not steel-cut or quick-cooking)
  • 1 cup raisins
  1. Whisk together dry ingredients in a medium-sized bowl & set aside.
  2. Cream together butter & sugars. Add vanilla, milk, & eggs; blend well.
  3. Add flour mixture; beat until just combined.
  4. Remove the bowl from the mixer (or, if you’re weak like me… just don’t); stir in the oats & raisins.
  5. Refrigerate dough until firm — 2 hours to overnight.
  6. Preheat oven to 350. Line cookie sheets with parchment.
  7. Scoop out about 2 Tbsp. of dough & shape it into a ball. Place on prepared sheet. Repeat with remaining dough, spacing the balls 3 inches apart. Press down with your palm to flatten to a 2-inch diameter.
  8. Bake until golden but still quite soft in the center. If you’re doing 2 cookie sheets at once, bake 16-18 minutes, rotating pans between shelves halfway through. If baking just 1 cookie sheet, bake just 14 minutes.
  9. Cool on wire racks.

What are your favorite road trip staples?

Tidy Mom

9 Comments

Filed under Recipes

The Munchkin’s colorful birthday.

For The Munchkin’s first birthday last June, I designed a color-wheel-inspired party around the rainbow cupcakes I posted yesterday.

A color theme is pretty much the easiest theme you can go with: there are no limitations on activities, & you don’t have to worry about logos or anything. I got everything at the Target Dollar Spot, Hobby Lobby, & Dollar Tree, so it was a really low-cost party too!

We started with a simple, graphic invitation to convey the paint theme. My mother-in-law had the great idea for a paint can card with a slit for a paintbrush to fit into. We’re not Photoshop masters, so it could look more professional, but it was creative & fun to make! We printed the images onto card stock, then cut out a double sheet in the paint can shape. I made a slit with an X-acto knife & glued the two paint can pieces together, just around the edges. The party details were hidden until you pulled the paintbrush out! (Click on the image to see the details better.)

Now to the most important part (to me, anyway): the food. The party was in the afternoon, so we didn’t need to serve a real meal; we had fresh fruit & other snacks arranged into a color wheel: red=watermelon, orange=carrots with ranch dip, yellow=pineapple, green=grapes, blue=blue corn tortilla chips with salsa, purple=grapes.

The drinks were brightly colored Kool-Aid in colorful pitchers. I made a “happy birthday” banner on a friend’s Cricut out of primary-colored cardstock & festive scrapbook paper, with colorful ribbon tied between each letter. To hold utensils, I took old empty soup cans & relabeled them “Birthday Girl Brand Paint.”

We covered each table in a different colored plastic tablecloth & put streamers & balloons wherever my help crew (aka: my husband & brother) felt like it. We also found coordinating paper plates, napkins, cupcake papers, & cupcake toppers with colorful polka dots at Hobby Lobby, but you could easily use solids in different colors.

Here’s the dessert table:

Also on the dessert table: the super easy, super cheap favors I made. Interested? I’ll continue. I baked my special chocolate chip cookies, but with M&Ms instead of chocolate chips. (I even picked out most of the brown ones, but you don’t have to be as weird as me.) Then I put them in small cellophane bags from Hobby Lobby & sealed them with regular old Inkjet labels that I printed with “Thanks for making my 1st birthday party more colorful! Love, [The Munchkin]”.

The kids kept busy with a number of different activities around the backyard. They enjoyed putting on “smocks” we made out of old t-shirts & fingerpainting pictures for a memory book for The Munchkin. We hung their works of art on a clothesline to dry, so they added to the decor.

The kids also colored pages out of a Sesame Street coloring book I got at Dollar Tree with crayons & markers. To hold the coloring stuff, I tied rainbow ribbon around old empty mason jars.

My mother-in-law found some great bath toys & butterfly nets in bright colors at the Target Dollar Spot, so we let the kids “fish” in a splash pool. Even though it wasn’t strictly related to painting, it was colorful & a big hit for that hot summer day! I also found small containers of bubbles in primary colors for the kids to play with & take home. Again, not painting-related, but fun!

The Munchkin loved her birthday cupcake, & it looked really pretty when it was smashed!

Finally, I just have to add this because it makes me laugh & hopefully will make you laugh too. From My Husband The Nerd:

2 Comments

Filed under Activities, Crafts