Monthly Archives: November 2015

Whole-wheat Pancake Mix.

Dairy-free option | Soy-free | Clean eating | Nut-free

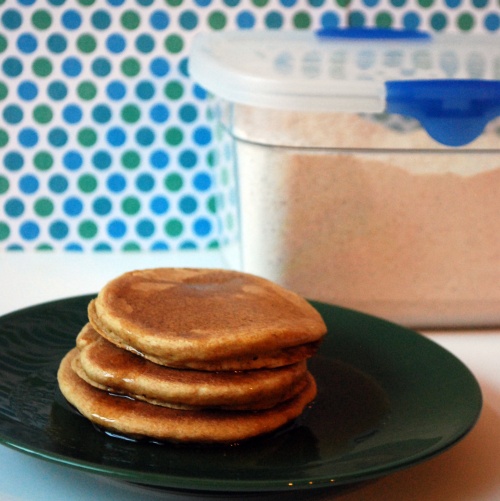
DSC_0056

Today I succumbed to the cold that my 3 girls have been passing around, and the last thing I want to hear when I’m feeling crummy is complaints about dinner. So I went to the grocery store for some soup for myself and my husband made pancakes for the girls. And it was quick and easy, thanks to the tub of whole-wheat, clean pancake mix I had mixed up a few weeks ago and kept in the pantry! I had taped on a Post-It with the list of “wet” ingredients to add, so no need to look up recipes. As easy as Bisquick, with whole foods instead of additives!

Whole-Wheat Pancake Mix (makes approx. 6 small batches)

  • 6 cups white whole-wheat flour
  • 1/3 cup coconut sugar
  • 2 Tbsp. baking powder
  • 1 Tbsp. baking soda
  • 2 tsp. salt
  1. Combine all ingredients in a large, airtight container, making sure to break up any clumps of coconut sugar. Store in your pantry until needed.

To make pancakes: (I usually double this to feed our hungry family)

  • 1 cup pancake mix
  • 1 egg
  • 1 cup buttermilk*
  • 1 Tbsp. canola oil
  1. Whisk ingredients together until just combined.
  2. Heat your griddle on medium and spray lightly with cooking spray.
  3. Ladle 1/4-cupfuls onto the griddle, wait until bubbles form and edges look set, then flip and cook until done.
  4. Repeat for remaining batter.
  5. Serve warm with pure maple syrup and maybe some peanut butter spread on top.

*Make your own buttermilk–you can even do nondairy! Add 1 Tbsp. white vinegar to a measuring cup, then fill the rest of the way to the 1-cup mark with regular milk. Even almond milk curdles this way! Give it a try!

Original recipe here


Leave a comment

Filed under Recipes

Outside-the-box ways to give this season.

Pies are cooling, turkey is dry-brined and in the refrigerator, so let’s take a break from Thanksgiving and talk about giving itself.

There are the standard ways you think of charitable giving during the holidays–spare change in the Salvation Army bucket, food drives, angel trees, sponsoring families, etc.–but here are a few more ideas maybe you haven’t thought of. They’re all easy, involving things you’re likely already doing during the holidays, are almost all free, and all help contribute a little to a lot of great charitable organizations. The more people who know about these, the bigger a difference we can make together!

amazonsmileHoliday shopping:

Odds are pretty good that you’re going to be shopping on Amazon in the next month. Next time, just go to smile.amazon.com, choose from over a million charities to support, and every time you shop, a portion goes to that charity. It’s the same website, with your same login, and millions of the same products are eligible for donation. So just remember to type a few extra letters before you do your Christmas shopping to help your chosen cause!

IMG_7175Letters to Santa:

Heading to the mall? Bring your kids’ letters to Santa! For every stamped letter addressed to Santa at the North Pole placed in a Macy’s red mailbox, the company donates $1 (up to $1,000,000) to the Make A Wish Foundation. Yep, it’s really that easy. Plus, it makes a great photo op, even if–especially if–your photo with St. Nick didn’t turn out so great. (You don’t want to see our Santa photos.)  Learn more here.

IMG_7321Every Mile Counts:

Do you run, walk, or cycle? Then get the free app Charity Miles. For every mile you go, a corporation donates 25 cents (10 cents for cycling) to your choice of over 30 charities. Even walking your kid to school, walking the dog, or walking the mall during your Christmas shopping–not to mention your morning run or spin class–can help raise money for charity. All you need to do is remember to turn on the app before you start moving! And you can get creative: turn it on indoor mode during a workout class; run it while you’re out mowing the lawn, raking leaves, or shoveling snow; run it on indoor at the grocery store. Just like that, you’re helping out charitable organizations by doing things you’re already doing anyway!

IMG_7320Shop with a Conscience:

(Photo cred: my 6-year-old)

Finally, while you’re shopping for friends and family, do a little research the companies you’re buying from. Many are already giving back, so by supporting them, you can support their causes. Here are a few we love. TOMS‘ motto is “one for one:” for every product you purchase, they provide someone in need with shoes, sight, clean water, safe childbirth, or counseling for bullying. Patagonia gives 1% to environmental organizations and is seriously dedicated to corporate and environmental responsibility. And my newest discovery is Punjammies, seriously comfortable and cute pajama pants (and t-shirts and other stuff) made by women in India wanting to remain free from sexual slavery; the parent organization, Sudara, provides them the job training they need to break the cycle and provide for their families. (Don’t tell my sister and sisters-in-law, but they’re all getting these PJs!)

So there you go. Just a few ways to make the things you’re already doing this season–heading to the mall, going for a run, doing your Christmas shopping–make a difference for someone else.

Had you already heard of some of these? What are some other ways you give back during the holidays?
2 Comments

Filed under Holidays

Wacky Cake: No eggs, milk, butter, or bowl needed.

Dairy-free | Soy-free | Egg-free | Gluten-free option | Nut-free

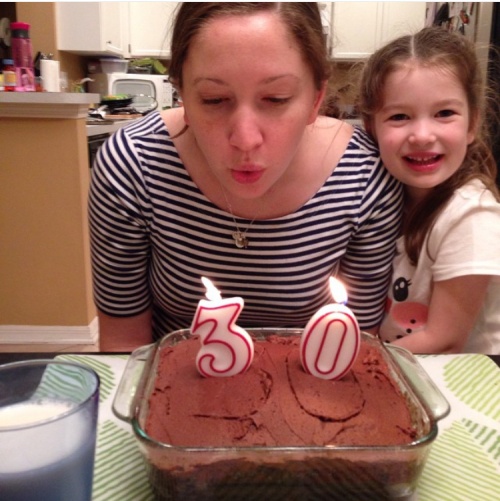
It’s my birthday week, so I thought I would share a birthday cake recipe!

IMG_7192

I found out my baby was MSPI three weeks before my 30th birthday. I was so dejected at the prospect of not being able to have cake on my birthday. But just a week later, this recipe started making the rounds on social media. It has been a lifesaver for me. It won’t win any awards for Most Delicious Cake In The History Of Ever, but when you don’t have another option, it tastes like the best thing on Earth.

It’s called Wacky Cake, or Crazy Cake, or Depression Cake–because lore says it was popular during the Great Depression, when eggs and butter were scarce, and because you actually make depressions in the dry ingredients to add the liquid ones. It rises thanks to the exothermic reaction between vinegar and baking soda and makes a great experiment with your kids. This is a great option for people who can’t have eggs or dairy–and I’ve read that it works well with gluten-free flours as well.

There are a few ways to make it. All of the different options are listed at another blog, but here are the ones I’ve tried and tweaked: Chocolate, Vanilla, and single-serving Mug Cake versions of both. I’ll tell you right now the chocolate is definitely the better tasting, but for those who prefer it, the vanilla option is there. That’s what we did for my MSPI baby’s first birthday, because she hadn’t had chocolate yet. For her birthday party a few days later, I used the chocolate mug cake recipe to make an extra-small batch of cupcakes so that she could have her own dairy-free cupcake while everyone else ate carrot cake.

I’ve also got the recipes for chocolate fudge frosting and vanilla “butter”cream frosting. So this will be a long post, but hopefully a useful one!

IMG_7193

Chocolate Wacky Cake

  • 1 1/2 cups flour
  • 3 Tbsp. cocoa powder
  • 1 cup granulated sugar
  • 1 tsp. baking soda
  • 1/2 tsp. salt
  • 1 tsp. white vinegar
  • 2 tsp. vanilla
  • 5 Tbsp. canola oil
  • 1 cup water
  1. Preheat oven to 350 and grease an 8-inch square or round pan.
  2. Combine dry ingredients in prepared pan (for round cake pan, mix all ingredients in a bowl and then pour the batter into the pan). Make 3 depressions in the flour mixture with your thumb. Pour the vinegar in one, the vanilla in another, and the oil in the third (it will overflow). Pour the water over all of it. Mix until completely incorporated.
  3. Bake 35 minutes or until a toothpick comes out clean. Cool completely before frosting.

Original recipe here

2-ingredient Chocolate Fudge Frosting 

Note: This is easy, but requires at least a day of advance planning.

  • 1 can full-fat coconut milk
  • 1 bag Enjoy Life semi-sweet mini chocolate chips
  1. Chill the can of coconut milk in the fridge overnight. Remove carefully from the fridge–DO NOT SHAKE–and carefully open. Spoon out the cream that has separated to the top into a saucepan. (You do not need the liquid “coconut water” underneath; save it to use in a smoothie later!)
  2. Add the chocolate chips to the saucepan. Melt them together over low heat, stirring frequently.
  3. Pour the melted chocolate into a mixer bowl, cover with plastic wrap, and refrigerate 2-3 hours or overnight. (Usually I refrigerate overnight, then leave it on the counter for the morning to soften a little.)
  4. Whip it with a hand mixer or the whisk attachment on your stand mixer until smooth and creamy. It will be a thick, ganache-like consistency. Thin with nondairy milk if desired, but really, you don’t need to. Add a pinch of sea salt if it floats your boat.
  5. Resist the urge to just eat the whole batch with a spoon, and frost your cake as desired.

Original recipe here

IMG_7191

Vanilla Wacky Cake 

  • 1 1/2 cups + 3 Tbsp. flour
  • 1 cup granulated sugar
  • 1 tsp. baking soda
  • 1/2 tsp. salt
  • 1 tsp. white vinegar
  • 2 tsp. vanilla
  • 5 Tbsp. canola oil
  • 1 cup water
  1. Preheat oven to 350 and grease an 8-inch square or round pan.
  2. Combine dry ingredients in prepared pan (for round cake pan, mix all ingredients in a bowl and then pour the batter into the pan). Make 3 depressions in the flour mixture with your thumb. Pour the vinegar in one, the vanilla in another, and the oil in the third (it will overflow). Pour the water over all of it. Mix until completely incorporated.
  3. Bake 35 minutes or until a toothpick comes out clean. Cool completely before frosting.

Original recipe here

Vanilla “Butter”cream Frosting

  • 2 sticks (1 cup) Earth Balance soy-free buttery stick, room temp
  • 6 cups powdered sugar
  • 2 tsp. vanilla
  • almond milk for thinning (optional)
  • 1 Tbsp. meringue powder (optional)
  • food coloring (optional)
  1. Using the paddle attachment on your stand mixer, cream the Earth Balance until smooth. Scrape the sides of the bowl, then add about half of the powdered sugar, mixing until incorporated.
  2. Add vanilla. Mix in remaining powdered sugar gradually, pausing to whip the frosting mixture at high speed before adding more sugar, until the frosting looks thick enough. Whip at least a minute more and adjust powdered sugar or almond milk amounts as desired. Add meringue powder if you want your frosting to hold its shape during decorating.
  3. Dye with food coloring if desired.

Quick Single-Serving Microwave Mug Cake – Chocolate or Vanilla

  • 5 Tbsp. flour
  • 4 1/2 Tbsp. granulated sugar
  • 2 tsp. cocoa powder (for vanilla, add an additional 2 tsp. flour instead)
  • 1/4 tsp. baking soda
  • dash salt
  • 1/2 tsp. white vinegar
  • 1/2 tsp. vanilla
  • 2 tsp. canola oil
  • 4 1/2 Tbsp. water
  1. Grease the inside of a large ceramic mug. Combine dry ingredients inside, mixing well with a fork.
  2. Use your index finger to make 3 depressions in the flour mixture. Pour vinegar in one, vanilla in the second, and oil in the third (it will overflow). Pour water over all. Mix with fork until very well incorporated.
  3. Place in microwave and cook, uncovered, on high 1 1/2 – 2 minutes–it will vary depending on your microwave. Don’t overcook! Remember there are no eggs, so a little underdone is ok–even delicious!
  4. Top with dairy-free chocolate chips, So Delicious CocoWhip, or whatever you like! Eat warm.
  5. FOR SMALL BATCH OF CUPCAKES: This recipe will fill about 3 cupcake liners. Fill remaining wells of your tin with water, then bake at 350 for 12 minutes or until a toothpick comes out clean. You’ll have to watch them carefully.

Original recipe here

1 Comment

Filed under Recipes

My Dairy-Free Thanksgiving.

Thanksgiving is less than two weeks away, and if you’re like me you’re probably trying to figure out what you’re making for dinner. A year ago at this time I was scrambling to figure out how I could keep a traditional and delicious Thanksgiving with a newborn and without dairy or soy. And you know what? I pulled it off! Some of these are so good that they’re finding their way onto our table again this year, even without dietary restrictions (except for my 1-year-old).

If you’ve got a dinner guest with dietary restrictions, or if you’re facing some yourself this year, here’s my dairy-free (and, of course, other-allergen-free) menu from last year. All photos are courtesy of the original blogs.

W-SFirst off, here’s my secret to the most flavorful turkey every year, regardless of how you prepare it: Williams-Sonoma dry brine. All you do is rub it on the turkey Wednesday night, keep it covered overnight in the fridge, then rinse off the brine just before you prep it for cooking. It adds the flavor and tenderness of a brine without the mess or time, and has never ever failed me. It’s dairy-free, soy-free, gluten-free, clean, and paleo. Just make sure you reduce the salt in your recipe.

slow-cooker-turkey3We had a small gathering last year, so a turkey breast was just the right size for us, and this Slow Cooker Turkey with No-Fuss Gravy from Mel’s Kitchen Cafe made it easy, delicious, and kept my oven clear for the sides since I was the only one cooking. And the gravy? Easily the easiest and tastiest I’ve ever made in my life. Because of the saltiness of the dry brine, I didn’t add any salt and used the no-salt-added chicken broth. I made it dairy-free by using Earth Balance buttery stick instead of the butter; you could easily make this gluten-free with rice flour or another fine-grain gluten-free flour, or make it clean with whole-wheat pastry flour. We’re expecting a crowd at this year’s dinner; this is so good I’m seriously considering making this turkey breast in addition to the whole turkey in the oven, if I can get home from my Turkey Trot in time.

stuffingMy family’s generations-old super-secret stuffing recipe is…. doctored Pepperidge Farm stuffing. (Shhhhh.) But the soy additives weren’t going to work last year, so I was going to have to make it from scratch. I used this America’s Test Kitchen Easy Stuffing Recipe, with a Whole Foods bakery dairy- and soy-free sandwich bread and Earth Balance buttery stick. Now, I’m going to be honest: Earth Balance does not brown like butter does. But it was delicious nonetheless.

I made my mashed potatoes smoother with a bit of Earth Balance, some chicken broth, and a touch of unsweetened almond milk. I don’t have a recipe for that; I just kind of added and tasted until the taste and texture was right. And anyway, with that slow cooker gravy, who cares what the potatoes tasted like on their own?!

sweetpotatocasserolevegan-2335Now these sweet potatoes are definitely staying on my table for years to come. Saweet! Potato Casserole with a Crunchy Nut Crumble from Oh She Glows is vegan (and thus dairy-free), gluten-free, soy-free, clean, and so incredibly delicious that I was actually a little disappointed that everyone else liked it so much because I seriously could’ve eaten the whole pan on my own. Now, just in case you think I’m exaggerating, my husband doesn’t like sweet potatoes, and he’s instantly suspicious of anything with a “healthy” buzzword like “vegan” or “paleo”–and he asked for seconds. If I had a double oven, I’d be making two of these this year. Now, if I remember right, I increased the amount of maple in the crumble, but I don’t recall by how much. Just taste and adjust as needed.

2011pumpkinpieFinally, the pumpkin pie. I’ve posted a milkless pumpkin pie of my Grandmother’s, but–no offense to her–I could never get the texture quite the way I liked it. This Dairy-Free Soy-Free Pumpkin Pie keeps the silky texture we’re used to, but amps up the flavor with the sweetness of coconut milk and a touch more spice than you see on the back of the Libby’s can. Sorry Grandmother–this is my new go-to pumpkin pie. I made the crust from my previously posted pumpkin pie recipe using canola oil to keep it soy-free; there are lots of great gluten-free crust recipes out there if that’s what you need. Top it with So Delicious CoCoWhip topping and you’ll be in Heaven. (I challenge you not to eat the CocoWhip with a spoon after your company has left…)

What are your plans this Thanksgiving? Are any of these or other allergen-friendly recipes going to be on your menu this year?

2 Comments

Filed under Holidays

Easy Paleo Slow Cooker Beef Stew.

Paleo | Dairy-free | Soy-free | Clean Eating | Gluten-free | Nut-free

DSC_0061

Lesson one: No amount of processing can save a poorly lit photo. (Thanks for nothing, Standard Time.)

Lesson two: However it may look, this stew tastes incredible. And it’s easy. And clean, paleo, low-glycemic, dairy-free, soy-free, and kid-approved!

Browning the beef beforehand sounds like an extra step, but it is SO important to the full flavor of this dish. And it’s a quick way to get your kitchen already smelling delicious before you even turn on the crock pot! Put this one on your list for the cold, busy weeknights ahead. (Please send some of that cold down here to Florida!)

Paleo Slow Cooker Beef Stew

Original recipe here

  • 2 Tbsp olive oil
  • 1 1/2 lbs stew beef (cubed)
  • 2 large parsnips, peeled and cut into large dice
  • 8 carrots, peeled and cut into large dice
  • 1 onion, cut into large chunks
  • 2 bay leaves
  • 1/8 to 1/4 tsp pepper
  • 2 tsp salt
  • 4 cups low-sodium beef broth
  • 1/2 Tbsp dried thyme (or 1 Tbsp fresh, chopped)
  • optional, to thicken broth: 1/4 cup tapioca starch
  1. Heat the oil in a large pan over high heat. Add the beef chunks, season with a little salt and pepper, and sear on all sides. Dump into your slow cooker and cover with the remaining ingredients, except tapioca starch.
  2. Cook on high 5-6 hours, or on low 8-9.
  3. Optional: if you want to thicken the broth, 30 minutes before the end of cooking time, whisk the tapioca starch with 2 Tbsp water. Pour the mixture into the stew, stirring gently, until distributed throughout, and allow it to resume cooking.
  4. Remove bay leaves and enjoy! In the unlikely event that there are leftovers, they reheat beautifully.

Leave a comment

Filed under Recipes

Magic One-Pot Pasta.

Meatless | Clean | Vegetarian option | Dairy-free | Soy-free | Nut-free

Have you read the children’s book Strega Nona, by Tomie de Paola? The main character is a grandmother witch who has a magic pasta pot. She sings a song to it, and it magically fills with fresh, hot pasta:

Bubble, bubble, pasta pot–
Boil me some pasta, nice and hot.
I’m hungry and it’s time to sup;
Boil enough pasta to fill me up.

Her bungling assistant, Big Anthony, thinks he knows her secret, but he forgets one crucial step and soon the whole town is swimming in pasta!

DSC_0044

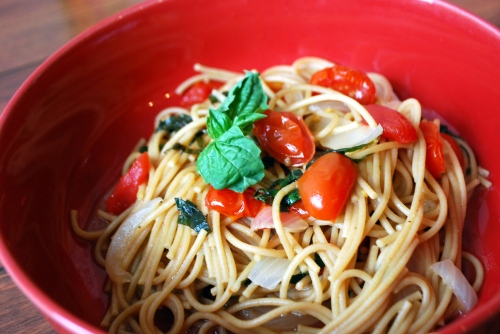
We love that book. And we love pasta! When I first introduced my girls to this recipe, I called it “Strega Nona pasta,” because it’s magic, just like hers! This pasta won’t magically appear in your pot, but it takes so few steps that it might as well. And at least you don’t have to worry about it overflowing and filling your house!

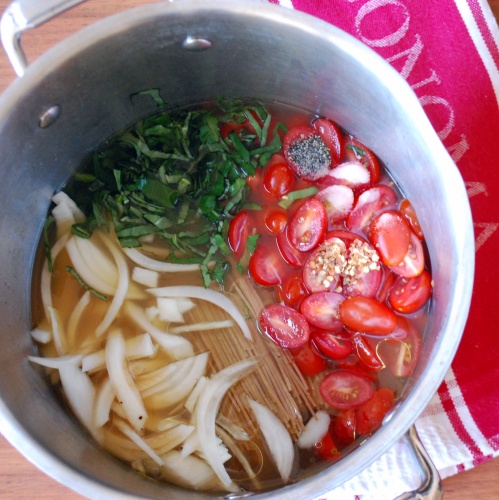
I love that I can dump all these fresh, delicious ingredients into a pot, turn on the burner, and when the timer goes off, I have a magical pot full of fragrant, hot pasta, ready to eat–I don’t even need to drain it!
DSC_0047

“Strega Nona” Pasta

Original recipe here

  • 12 oz. whole-wheat spaghetti (I throw in a couple handfuls of short pasta, like whole-wheat rotini, for my little ones as well)
  • 1/2 large yellow onion, sliced
  • 2 cups (1 pint) grape or cherry tomatoes, halved
  • 2 sprigs fresh basil, chiffonade (cut into ribbons)
  • up to 1/2 tsp red pepper flakes (I use 1/4 tsp)
  • up to 1/4 tsp black pepper
  • 2 tsp salt
  • 2 Tbsp olive oil
  • 1 Tbsp good-quality balsamic vinegar
  • 4 to 4 1/2 cups chicken (or “no-chicken” or vegetable) broth
  • optional: fresh grated parmesan
  1. Dump all ingredients into a large pot with tall sides. If your pot isn’t wide enough for your spaghetti to lie flat, break the spaghetti in half.
  2. Bring to a boil over high heat; boil 10-12 minutes or until pasta is cooked and much of the liquid is absorbed.
  3. Serve immediately, topped with parmesan if desired.

2 Comments

Filed under Recipes

Black Bean and Corn Enchiladas.

Vegetarian | Clean eating | Dairy-free option | Soy-free | Gluten-free option

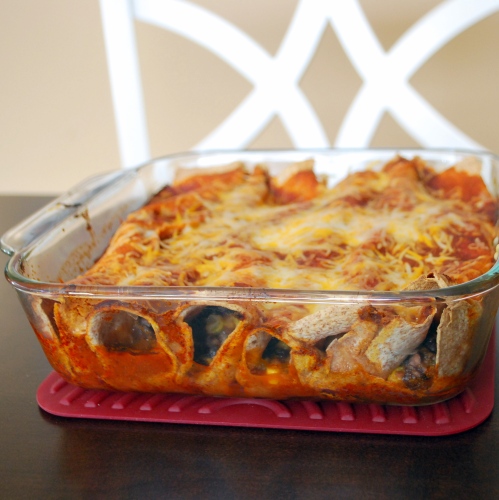
Meet my husband’s favorite meal:

DSC_0021

Ok, so it’s really hard to make enchiladas look sexy, but trust me, they’re awesome. The key is the homemade enchilada sauce. I love restaurant enchiladas, but never loved how they tasted when I made them at home using the canned sauce. The homemade stuff a total game-changer. I make a double batch so that I can freeze half of it for another time. For our family, I can get away with stretching the filling to two 9×9 pans–one for now, and one to either give away or freeze for later (the Hefty foil pans are ideal for either use). So when I double the sauce, I get enough for four dinners’ worth of deliciousness!

Keep this one clean with whole-grain tortillas and less-processed chicken broth in the sauce. Make it truly vegetarian with “no-chicken” broth. Make it dairy-free with vegan cheese: we use Daiya cheddar shreds and it tastes similar enough that my husband and kids don’t pitch a fit. Make it gluten-free with the right tortillas.

Black Bean and Corn Enchiladas

Enchiladas: adapted slightly from here.

  • tortillas of choice
  • 2 cans black beans, drained and rinsed
  • 1 cup frozen corn, defrosted
  • 6 oz (1 1/2 cups) shredded Mexican blend cheese or Daiya shreds, divided
  • heaping 1/2 tsp cumin
  • heaping 1/2 tsp paprika
  • 2 cups enchilada sauce (below)
  • 1/4 cup onions strained from sauce (see below)
  1. Preheat oven to 375 and spray a baking dish (one 9×13 or two 8x8s).
  2. In a large bowl, combine the beans, corn, 4 oz (1 cup) of the cheese, spices, and strained onions. Use a fork to mash some of the beans so that mixture is chunky and incorporated, keeping some of the beans whole.
  3. Lay a tortilla flat and spoon about 2 heaping Tbsp (or more, if you like a larger filling-to-tortilla ratio) into the center. Roll it up and place seam-side down in the prepared baking dish, then repeat until dish is filled.
  4. Pour sauce over enchiladas (if preparing 2 pans, pour 1 cup over each pan), then top with remaining shredded cheese. (If freezing, wrap well with foil and plastic wrap and freeze at this stage. Then thaw 24 hours before baking.) Bake, uncovered, 25-30 minutes or until bubbly and cheese is melted.

Enchilada sauce: adapted from here. Tip: Double it!

  • 1 Tbsp olive oil
  • 1 small onion, diced
  • 2 cloves garlic, minced
  • 1-3 Tbsp chili powder, to taste
  • 1 Tbsp cumin
  • 1 tsp salt
  • 15-oz. can tomato sauce
  • 1 cup chicken (or no-chicken) broth
  1. Heat the oil in a large saucepan over medium-high heat. Add onion and saute for a few minutes, until just beginning to brown around the edges. Add the garlic, spices, and salt; toast until fragrant, about a minute.
  2. Stir in the tomato sauce and chicken broth and bring to a boil. Reduce heat to low and simmer 10 minutes.
  3. Remove sauce from heat and pour through a strainer set over a bowl. Use a rubber spatula to press the onions into the mesh and force out more of the sauce. Save about 1/2 cup of the onions to mix into the filling.
  4. This makes about 2 cups sauce. It keeps in the fridge for up to a week, or the freezer for up to 3 months!

Leave a comment

Filed under Recipes