Tag Archives: party

Summer Reading Party!

FullSizeRender

The idea for this came about at the end of the school year, when moms everywhere were scrambling to think of ways to keep our kids from killing each other and forgetting everything they’d just learned. My friend Chrissy, who also can’t contain herself when it comes to planning her kids’ birthday parties, found a printable Summer Reading Bingo sheet and shared it on Facebook with a caption to the effect of, “There’s a Reading Party on here. Anyone want to join us?”

We did.

We got a couple other crafty moms together, found a date, and the Book Club Party was born.

With The BFG film coming out, and with many of these 2nd-through-4th-graders reading it or Charlie and the Chocolate Factory for the first time, we decided on a Roald Dahl party. Kids read either (or both) of the books, and had to have at least one Bingo on their sheet to gain entry. (My rising 2nd grader took that part very seriously.)

Chrissy had some decorations left over from her daughter’s Willy Wonka birthday party a year ago, so we were able to keep this really low-budget, low-effort operation. I also restrained myself and only printed out 5 quotes from the 2 books to put on the wall.

IMG_9795

You can download a Willy Wonka font for free here.

None of us got a shot of the food, but here was the theme menu:

  • Snozzberries (berries)
  • Treats dipped in the Chocolate River (fondue)
  • Miniature Wonka bars (free printable wrapped around Hershey Nuggets) IMG_9779
  • Frobscottle (vanilla ice cream and raspberry sorbet with green-dyed ginger ale poured over the top–I might use Sprite next time so it’s sweeter) IMG_9796
  • I tried to think of a non-messy way to serve “Human Beans,” but couldn’t come up with anything. Then my friend Wendy mentioned crunchy roasted chickpeas would be delicious. So consider that.

Activity 1: we made dream jars from the BFG (out on the lanai to contain the glitter).

IMG_9800

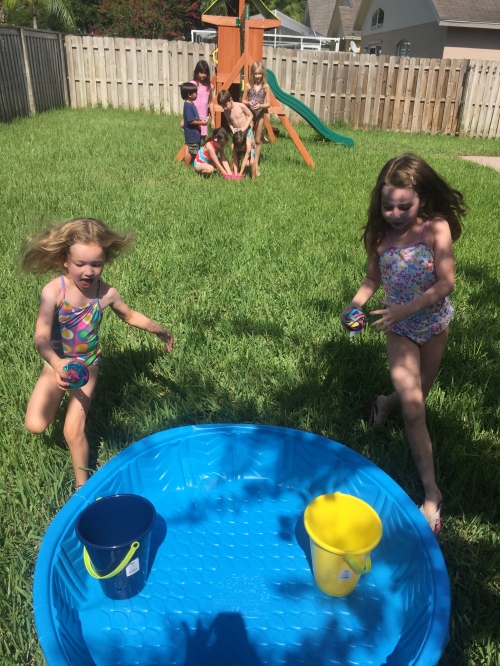
Activity 2: Juicing Violet Beauregard. I got the idea from here. I bought a few of the bluest splash balls I could find at Target, filled a punch bowl with water and a few drops of blue food coloring, and positioned a couple buckets at another end of the yard. The teams took turns filling their splash balls with “juice” running across the grass to squeeze them into their bucket. The team with the fullest bucket at the end of 3 minutes won.

IMG_9803

We then attempted an activity involving catching “dreams” (water balloons) in those same buckets (yes, the connection was tenuous at best; it’s hard to think of literary-based water games, trust me), but had an injury when someone missed, so I won’t recommend that one.

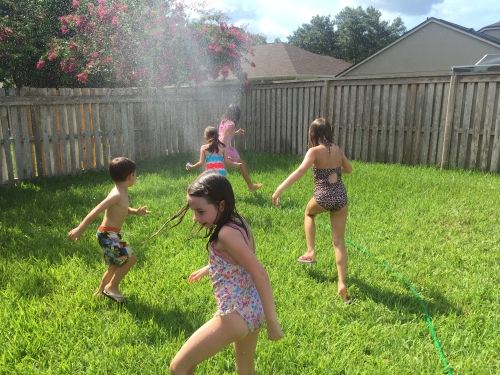
Then we turned on the sprinklers and just let the kids run! Because kids need unstructured play time too.

IMG_9808

The party was a success! It was fun to share the joy of some of our favorite childhood books with our kids, and let them share these literary experiences with their friends.

Leave a comment

Filed under Activities, party

Mermaid Party Redux.

My last post talked about why we shouldn’t overdo it on the party planning. But purchasing everything pre-assembled can get pricey, so here are a few cute things I did to save money & personalize it a little for my Munchkin. I was so busy having fun that I didn’t meticulously take pictures of my handiwork, but I think that’s a good thing (except when I’m trying to explain to other people what I did).

For starters, this is the party theme I bought. However, rather than buying everything to fit the theme, I saved money by only buying the swirly hanging decorations (see below), tablecloths, invitations, & dessert plates. For everything else–flatware, napkins, dinner plates, & even a couple extra tablecloths–I bought cheaper, solid-color items in the party’s colors: light blue, purple, & hot pink. I also got balloons in those colors.

The Munchkin was insistent that the kids all wear party hats, so we got assorted solid-color ones at Party City that happened to match the theme colors really well, then decorated them with sea animal stickers together. She loved helping! In previous years I would’ve been too much of a perfectionist to let her help.

(In the interest of full disclosure, we learned rather quickly that paper hats tend to dissolve after several minutes atop wet heads. But they were fun & they stayed on for the cake, which is what The Munchkin wanted anyway.)

Now for my favorite part: the favor buckets. I bought these sandcastle buckets from Party City for 99 cents (my advice: sign up for their emails before you order; I started getting all sorts of discount offers after I’d placed my order!). They come in 8 different colors, so I’m sure they’d match your theme colors. Then I filled them with awesome cheap sea-life-themed favors from Oriental Trading Company. I hate the buckets that are full of useless crap, so I tried to choose things the kids would actually like to use. The Munchkin loves bubbles, stickers (those were from Party City & also delightfully cheap; we bought extra to decorate the hats with), & stampers, so we included those & a squirty fish thing, then a bag of Goldfish & just a few pieces of candy. To assemble them, we grouped like items together & formed an assembly line; it taught The Munchkin to follow patterns!

These buckets would be great for any ocean-type theme. They received lots of compliments, & they were simple & inexpensive!

Next, the thank-you notes that came with the party supplies were the fill-in-the-blank kind. Those are great for kids who are learning to write, but The Munchkin’s still young enough that I’m doing the writing for her. So fill-in-the-blank would be kind of a copout. Instead, I bought blank notecards from Target (again, they come in lots of cute colors) & puffy stickers from Michael’s (can you tell I like stickers?). The Munchkin & I decorated the cards in little sea life scenes. You could do this with any theme imaginable & it’d look great!

Last but not least, activities. One of the great perks of having the party at the splash park was I didn’t have to coordinate activities. But with Tropical Storm Debby threatening, I came up with a couple last-minute things to keep the kids busy under the pavilion in case we had a momentary downpour. I printed an Ariel coloring page & a couple of sea animal coloring pages & had a bucket of crayons. Then we let the kids make jellyfish. To prep, just cut cheap white paper plates in half & have streamers & a stapler handy. The kids color their jellyfish, & then you tear off some streamers & staple them to the straight side. So easy!

So there you go! Hope this helps with the planning of any ocean-themed parties in the future. Just remember to listen to your own Munchkin rather than what the professionals on Pinterest think, & keep it simple: if you overdo it this year, you’ll just have to try to outdo yourself next year!

Good luck!

Leave a comment

Filed under Activities, Crafts

Witch (or Wizard) Hat Calzones.

It’s Halloween. The kids are so excited for trick-or-treating they don’t want to eat dinner. So they pick at their food & then wind up getting sick from too much candy on an empty stomach. That was a lot of our Halloweens growing up. Fortunately, I have a solution. Meet our most favorite Halloween meal ever:

These calzones are so fun & tasty — the kids get to decorate their own! — that they’ll finally eat dinner on Halloween!

I first found these at BHG, then made the filling tastier & more substantial for eating as an entree instead of an appetizer. 1 calzone would be good for a little kid, while big kids & adults will probably need 2 to keep their strength up for an entire evening of trick-or-treating. These could also be great as “Sorting Hats” for a Harry Potter party.

  • 3.5-oz. pkg. pepperoni slices*
  • 2 oz. cream cheese, softened
  • 1/4 cup parmesan
  • 1/4 cup shredded mozzarella
  • 2 pkgs. (8 oz. each) crescent roll dough
  • 1 egg, slightly beaten
  • decorations like olives, capers, bell pepper, parmesan, red pepper flakes, Italian seasoning, etc.
  • pizza sauce, warmed, for dipping

* You can make these vegetarian by using about 3 oz. of very finely diced quick-cooking veggies like peppers & onions.

  1. Preheat your oven to 425 & grease 2 cookie sheets.
  2. Reserve a few slices of pepperoni to cut into shapes for decorations. A sharp paring knife & a few minutes can yield everything from simple triangles (cut a pepperoni slice like a pizza) to stars (cut 5 triangles out of a slice) & even jack-o-lanterns (uhhh… just use your head). You can do this with bell pepper as well if you’re going the vegetarian route.
  3. Then chop up the remaining slices finely.
  4. In a small bowl combine the pepperoni with the cream cheese, parmesan, & mozzarella. Use the back of the spoon to “smoosh” it together to form one mass that sticks together. This will be your filling.
  5. Carefully unroll a package of crescent roll dough & separate into triangles. Place them on your prepared baking sheets. Place a tablespoonful of dough into the center of each triangle & try to spread it out just a little so it’s not just one big lump, but stay at least a 1/2 inch away from the edges of the triangle, & even further than that from the short edge, if you can. (See the triangle on the right, below.)
  6. Then carefully unroll the other package of crescent roll dough & separate into triangles. Add a little water to your beaten egg & brush the mixture around the edges of each triangle & carefully lay a new triangle on each prepared triangle (see above). Be sure to seal the edges with your fingers.
  7. Brush the bottom (short) edge of each triangle with more of the egg mixture & fold/roll it up to form a brim for your hat. Then tweak the top of each hat to make it more crooked & spooky. (Basically I just kind of bend them into a bit of a squiggle.)
  8. Finally, brush the whole thing with more egg & let your ghouls & goblins decorate their hats however they’d like. Bake for 7-9 minutes or until golden & serve with pizza sauce.

works for me wednesday at we are that family

Cast Party Wednesday

36th Avenue

Passionately Artistic

Pin’Inspirational Thursdays

8 Comments

Filed under Holidays, Recipes

Toodles cake tutorial.

As promised, here is the tutorial for the Toodles cake I made for The Munchkin’s “Mickey Mouse Clubhouse” party last weekend. Check out the rest of the party here.

Disclaimer: I am NOT a professional cake decorator — as I’ve mentioned before, I haven’t even taken a Wilton class — so I’m not pretending to be an expert, but I can give you a few of the tips & tricks I use. If you ARE a professional cake decorator, just skip straight to the part about flattening the Starbursts for the dots.

First, I baked a cake. (Duh.) I really like the Easy Yellow Cake recipe in the KitchenAid manual/cookbook. It’s easy, not too sweet, & holds up well while still staying moist. I’ve included the recipe at the end. A few days in advance of the party, I baked two 9-inch round pans & then carved them to my desired shape by finding some things in my kitchen that were the right size & shape & then using a sharp serrated knife to cut around them. In this case, I used a cereal bowl & the bottom of my meringue powder container. Then I double-wrapped each piece in two layers of Saran Wrap & put them in the freezer until I needed them. Freezing the cakes is important for 3 reasons: 1) It keeps the cake from going stale, 2) It allows you to break up the process so you don’t have to do it all at once, & 3) It reduces crumbs on the cut edges while frosting.

Then I made frosting. Lots of frosting. In this case, I used the extra left over from these Cars cakelets. In case you’re as dissatisfied as I am with my “add some powdered sugar &/or cream until it looks right but will probably end up being too thick anyway” method for frosting, try this: 2 sticks of butter, 6 cups powdered sugar, 2 tsp. CLEAR vanilla (best for dyeing), & milk or cream to desired thickness. Remember thinner is better for spreading. If you’re paranoid like me about running out, you may want to add half again as much of everything. I filled the cake with the delicious chocolate frosting I used for Mater, because I believe yellow cake just goes with chocolate frosting, but you can do what you want. If you’re not crazy like me & making a zillion cakes in 1 week, it’s probably not worth it to make up a whole other batch of frosting just to fill your cake.

Don’t forget to add a couple tablespoons of meringue powder to your frosting to help it set up & stay upt while & after your frost. Then use gel food coloring to dye it to your desired colors. (Tip: “Golden Yellow” is a lot more orange than it looks on the bottle. I think just plain old “Yellow” would’ve looked better.)

Now for the fun part!

First, take a cake board or some cardboard & wrap it in some pretty paper. This sounds silly, but it really does make a HUGE difference in the presentation. Pull your cake pieces out of the freezer & unwrap them, then slap a dab or two of frosting under the cake (all 3 pieces parts if they’re disconnected like they are here) to keep it from sliding off your pretty board. Fill your cake, if needed.

Put several pieces of wax paper around the edges of your cake to protect your cake board. When we’re done frosting, we’ll slide these out & cover any gaps with a pretty frosting border.

Now we crumb coat. Take some frosting (plain un-dyed white is fine, but we used the already-dyed stuff) & thin it with a tiny bit of milk. Use an offset spatula like this one to make a thin layer to trap the crumbs. Have a paper towel handy to wipe any crummy frosting off of your spatula so you don’t contaminate your frosting. It doesn’t have to look pretty. Then stick your cake back in the freezer for a few minutes. (P.S. Shout-out to My Husband The Closet Ace of Cakes, who almost always does all of my frosting spreading so I just have to do the pretty stuff.)

Then pull the cake back out of the freezer. Grab your frosting, offset spatula, a dish towel, & a bowl or pie plate full of hot water. Sound weird? Just trust me. Spread your frosting, then smooth it by submerging your spatula in the hot water & then drying it completely with the dish towel. The warm spatula kind of re-melts the frosting to smooth out any bumps for you.

Now for the Starbursts. When I was trying to think of what to make the dots out of, my first thought was fondant. But you already know about My Husband The Opinionated’s feelings on the subject; plus, I didn’t want to either buy 3 colors of fondant or go to all the effort of learning how to dye it myself. Then I remembered a cake that my friend Laura had made for my baby shower 2 years ago: she made flowers out of flattened Starbursts! Perfect! So I called her up & she shared with me how to do it.

Unwrap a few Starbursts & stick them between the layers of a folded sheet of wax paper. Microwave it all for about 7 seconds, just enough to soften them. Use a rolling pin to flatten them to your desired width & thickness, stopping often to pull them off of the wax paper so they don’t stick. For a larger shape, you can even melt two candies together, side by side. That’s what I did for the largest red circle.

Now here’s the funny part. To cut them to the desired shape, use… scissors! You can use a stencil if you want to get them perfectly round, but I found it easiest to just eyeball it. I wound up making way more than I needed, so we just ate the extras.

Position them where you want them on your cake, & trim edges to fit if they’re on the edge. You should be able to just press them into your frosting, but if they’re overlapping one another, just pipe a tiny bit of frosting on the bottom of your top one to secure it.

Now put your frosting into piping bags (I use disposable ones because I don’t decorate often enough for the nice ones to be a savings, & I just prefer the ease of tossing them) with a coupler in the bottom of each to make it easier to switch tips. The tips I used were a 5 writing, 18 star, & 16 star.

I Nnever trust my freehand artistry skills, so I always try to find things to trace. Sometimes it’s a little odd, but it works. For the “poles” on Toodles’ face, I used part of a Zicam bottle cap. For the circles inside his ears, I used my half-tablespoon. I make small depressions in the hardening frosting to trace.

Then I actually did freehand the gear detail on his ears, consulting a picture I printed off the Internet every single step of the way. I filled in all the red details with my writing tip, & chose to smooth the “poles” the same way we did the frosting base, just with a smaller spatula. But I think they ended up looking too much like the Starbursts, so if I did it over, I’d leave it textured like I did the gear details.

Finally, I used the smaller star tip to do a shell border around the top in red (I think yellow would have been more accurate to the show, but I was worried about running out) & then carefully slid the wax paper out (I used my small spatula to keep the frosting in place) & used the larger star tip to do a shell border around the bottom in blue. This cleaned up all the edges & just gave it a more polished look. I also wrote The Munchkin’s name on the front side of the cake using my writing tip, but I’m not going to show that to you because I’m not ready to reveal her identity.

So there you go! I hope that this tutorial is helpful; if you wind up using it for your Munchkins, I would seriously love to see pictures! Comment with links, or email me (on the “About” page)!

Last, but not least, here’s the cake recipe. Happy thoughts go to my good friend Mandy, who saved me by emailing it to me when I couldn’t (still can’t — hopefully it’ll show up after we move?) find my manual.

KitchenAid Easy Yellow Cake

  • 2 1/4 cups all-purpose flour
  • 1 1/3 cups sugar
  • 3 tsp. baking powder
  • 1/2 tsp. salt
  • 1/2 cup shortening
  • 1 cup lowfat milk
  • 1 tsp. vanilla
  • 2 eggs
  1. Preheat oven to 350. Grease & flour (I prefer Baker’s Joy or PAM for Baking — 1 step!) two 8- or 9-inch cake pans
  2. Add dry ingredients to mixer bowl. Add shortening, milk, & vanilla; use flat beater to mix about 1 minute at speed 2. Scrape bowl.
  3. Add eggs; mix about 30 seconds on speed 2. Scrape bowl.
  4. Beat at speed 6 for 1 minute.
  5. Pour batter into prepared pans & bake 30-35 minutes or until toothpick inserted in center comes out clean.
  6. Cool in pans for 10 minutes, then drop pans gently on the counter to free the cake from the sides of the pans & invert onto a wire rack to remove. Cool completely.
  7. Carve, freeze, & frost as above.
Tidy Mom

Join  us Saturdays at tatertotsandjello.com for the weekend wrap   up           party!

10 Comments

Filed under Recipes, Tutorials

How to make a licensed character party look homemade.

Have you ever noticed that the parties featured on all those professional party planner blogs all have generic themes, like bubbles, cars, or even just colors? But your kids aren’t going to request a “pink damask” party theme; they’re going to request Hello Kitty, Superman, Elmo, or, say, Mickey. So how can you give them what they want while still adding a personal, homemade touch like the professionals do? Do it yourself!

The Munchkin and SIX — yes, six — of her playgroup friends all have birthdays within a few weeks, if you can believe it. So the moms all got together & decided that, rather than spend the whole month of June going to each other’s birthday parties, why not do a joint party? We just had to figure out the one thing all seven could agree on: “Mickey Mouse Clubhouse”!

I quickly volunteered to be in charge of the decorations, & I did everything with a personal, homemade touch with just over $30! You can too!

Here’s what I used:

  • a few feet of grosgrain ribbon (you can see it in the banner in the photo above)
  • 3 sheets of posterboard (34 cents each at Target)
  • 3 rolls of streamers: red, yellow, Caribbean blue
  • 3 cheap vinyl tablecloths in the same colors
  • The Munchkin’s coloring books
  • a few minutes at Kinko’s
  • The Munchkin’s crayons
  • my friend’s Cricut & her Mickey cartridge
  • free Disney fonts I downloaded from online

That’s it!

I started by going to my friend Maile’s house, where she very graciously helped me cut out dozens of Mickey shapes. That shape is forever seared in my brain. It reminded me of when we learned about children’s book author Bill Peet, who got his start as an inbetweener in Disney’s animation department, but quit when he had a nervous breakdown while animating a Donald Duck cartoon & ran out of the building screaming, “No more ducks! No more ducks!” As I was gluing (& gluing. & gluing.) I thought several times, “No more Mickeys! No more Mickeys!”

But seeing it all put together was totally worth it. The Mickeys ended up all over the place, like on these treat bags. It was a great way to reinforce the theme in a less cartoony way. (I attached a Sharpie on a ribbon to the sign to let the parents write their kids’ names on their bags.)

I used more Mickeys & some brightly-colored cardstock I already had to make placecards for the dessert table. Please forgive the really horrible rubbing out of names… I haven’t spent the $24.95 for the good version of Picnik to do name-blurring the right way. But under the horribleness is each name in free Mickey font. The other 6 kids got Wal-Mart cakes in the Disney character of his or her choice, but we’re cake snobs in this house, & besides, I’d been envisioning this Toodles cake for months. So that’s what The Munchkin got. I’ll post the tutorial Friday!

The signs were photocopies I enlarged from The Munchkin’s coloring books at Kinko’s (for a whole $2.06 total) & glued onto pieces of posterboard. Then My Husband The Artiste & I spent an evening coloring them in while watching Newsies. (Could our family get any more Disney? Maybe I should look into sponsorship or something for all this product placement…) Here are some of them; the “Birthday Clubhouse” logo was designed by the aunt of one of the birthday boys, who’s a professional photographer & graphic designer. She used it for the awesome invitation she made, which I for some reason can’t edit my ghetto way & still save. I’ll try to get it from her so you can see all its awesomeness.

We put each of the characters on a pillar of the Clubhouse, which was the gazebo outside our apartment complex. Perfect, right?

Even more perfect was the fact that Mickey Park was right next door! The kids entertained themselves by playing on the adjacent playground, drawing with sidewalk chalk like Daisy, & fishing for more treats for their treat bags with a “handy fishing rod” my friend Wendy made from a paint stirrer, some yarn, & 2 felt hands glued on either side of a clothespin. Total cost: $2.

Finally, here’s the food table. We had two kinds of chips & homemade salsa from my friend Halley (one was a fruit salsa I am definitely making & hopefully posting in the near future), Mickey-shaped cheese (find them at Wal-Mart) & crackers, chocolate covered raisins, Swedish fish (I mean, “Gooey Fish”), fresh fruit, & Hot Diggity Dogs (find them at Costco).

I made the banner & table tents from more of that scrapbook paper & free Mickey font.

So there you have it! All you need is some paper, coloring books, & creativity, & you can have a beautiful birthday party & a very happy birthday Munchkin…

…or seven!

Don’t forget to come back Friday to see the Toodles Cake tutorial! Here’s a sneak peek:

works for me wednesday at we are that family36th Avenue

7 Comments

Filed under Activities, Crafts

As seen on The Birthday Blog!

My rainbow cupcake tutorial is being featured today on The Birthday Blog! Go check it out!

Don’t forget to check out the party I organized around these colorful babies!

I’ve definitely got birthday fever — The Munchkin turns 2 in a month, we’ve already bought her some (very Disney) presents, & we’re planning a (very Disney) birthday bash with 5 other birthday kids, if you can believe it! It’s going to be a blast!

2 Comments

Filed under Activities, Recipes

The Munchkin’s colorful birthday.

For The Munchkin’s first birthday last June, I designed a color-wheel-inspired party around the rainbow cupcakes I posted yesterday.

A color theme is pretty much the easiest theme you can go with: there are no limitations on activities, & you don’t have to worry about logos or anything. I got everything at the Target Dollar Spot, Hobby Lobby, & Dollar Tree, so it was a really low-cost party too!

We started with a simple, graphic invitation to convey the paint theme. My mother-in-law had the great idea for a paint can card with a slit for a paintbrush to fit into. We’re not Photoshop masters, so it could look more professional, but it was creative & fun to make! We printed the images onto card stock, then cut out a double sheet in the paint can shape. I made a slit with an X-acto knife & glued the two paint can pieces together, just around the edges. The party details were hidden until you pulled the paintbrush out! (Click on the image to see the details better.)

Now to the most important part (to me, anyway): the food. The party was in the afternoon, so we didn’t need to serve a real meal; we had fresh fruit & other snacks arranged into a color wheel: red=watermelon, orange=carrots with ranch dip, yellow=pineapple, green=grapes, blue=blue corn tortilla chips with salsa, purple=grapes.

The drinks were brightly colored Kool-Aid in colorful pitchers. I made a “happy birthday” banner on a friend’s Cricut out of primary-colored cardstock & festive scrapbook paper, with colorful ribbon tied between each letter. To hold utensils, I took old empty soup cans & relabeled them “Birthday Girl Brand Paint.”

We covered each table in a different colored plastic tablecloth & put streamers & balloons wherever my help crew (aka: my husband & brother) felt like it. We also found coordinating paper plates, napkins, cupcake papers, & cupcake toppers with colorful polka dots at Hobby Lobby, but you could easily use solids in different colors.

Here’s the dessert table:

Also on the dessert table: the super easy, super cheap favors I made. Interested? I’ll continue. I baked my special chocolate chip cookies, but with M&Ms instead of chocolate chips. (I even picked out most of the brown ones, but you don’t have to be as weird as me.) Then I put them in small cellophane bags from Hobby Lobby & sealed them with regular old Inkjet labels that I printed with “Thanks for making my 1st birthday party more colorful! Love, [The Munchkin]”.

The kids kept busy with a number of different activities around the backyard. They enjoyed putting on “smocks” we made out of old t-shirts & fingerpainting pictures for a memory book for The Munchkin. We hung their works of art on a clothesline to dry, so they added to the decor.

The kids also colored pages out of a Sesame Street coloring book I got at Dollar Tree with crayons & markers. To hold the coloring stuff, I tied rainbow ribbon around old empty mason jars.

My mother-in-law found some great bath toys & butterfly nets in bright colors at the Target Dollar Spot, so we let the kids “fish” in a splash pool. Even though it wasn’t strictly related to painting, it was colorful & a big hit for that hot summer day! I also found small containers of bubbles in primary colors for the kids to play with & take home. Again, not painting-related, but fun!

The Munchkin loved her birthday cupcake, & it looked really pretty when it was smashed!

Finally, I just have to add this because it makes me laugh & hopefully will make you laugh too. From My Husband The Nerd:

2 Comments

Filed under Activities, Crafts